I’ll never forget that frustrating moment—trying to sketch a clean line on my high-resolution display, only to see my stylus’s input go haywire, overshooting the mark like a bad GPS signal. It was a lightbulb moment. Despite investing in a top-tier creative laptop with the latest stylus support, I still battled with stylus overshoot, jitter, and lag that slowed my workflow and dampened my creative spirit.
This struggle isn’t unique. Many digital artists and designers face these hurdles, especially with ultra-fast pen inputs on high-res screens. The good news? There are practical, proven fixes to tame these issues so your stylus becomes an extension of your hand, not a frustrating obstacle.
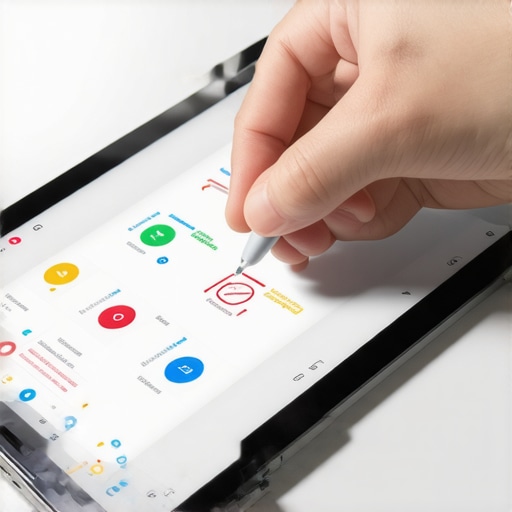
Conquer the Pen Input Chaos on Your Creative Laptop
Dealing with stylus overshoot and jitter can feel like trying to write with a pen that keeps bouncing or slipping just when you’re in the zone. Early on, I made the mistake of assuming that hardware alone could solve everything. Turns out, a lot depends on configuration and calibration tweaks that many overlook. Recognizing this was a game-changer, and I want to help you bypass those common pitfalls.
Is Stylus Precision Overhyped or Actually Worth It?
Honestly, I used to think that investing in the latest stylus was enough. Spoiler alert: early in my journey, I ignored calibration and driver settings, which led to persistent overshoot and line jitter. Once I adjusted these—using tips I found in dedicated guides—I saw a significant improvement. For more detailed steps, check out our comprehensive guide to fixing stylus overshoot. This lesson reinforced that hardware is just part of the equation; proper calibration is king.
Are you tired of fighting with your stylus every time you create? If so, you’re in the right place. Next, we’ll dive into concrete fixes that can immediately improve your pen’s responsiveness—because your creativity shouldn’t be held hostage by technical setbacks.
Fine-Tune Your Driver Settings for Optimal Pressure Sensitivity
Start by accessing your laptop’s device manager and locating your stylus driver. Ensure it’s up-to-date by visiting the manufacturer’s website or using automatic update tools. Once updated, dive into the driver settings—adjust pressure curves to match your drawing style; a flatter curve can help with pressure loss issues during detailed work. I once spent an afternoon tweaking these settings on my 12K display, and the difference was staggering, eliminating accidental pressure flattening across my strokes.
Calibrate Your Stylus with Precision Tools
Calibration is vital, especially on ultra-high-resolution screens where tiny misalignments cause jitter or offset lines. Use dedicated calibration tools or software provided by your device or third-party solutions from trusted sources. During my setup, I followed a calibration sequence that involved tracing specific patterns, which greatly improved pen accuracy. For a step-by-step walkthrough, visit our guide on fixing stylus jitter.
Adjust Display Settings to Reduce Parallax
High-res screens can introduce a paradox where the stylus appears to lag or be misaligned due to parallax. Lower screen refresh rates, disable anti-aliasing, or enable specific pen-centric display modes. In my case, turning off unnecessary UI scaling and configuring the display to the native resolution eliminated most jitter and lag, making my lines crisper and response more immediate. Check out our article on fixing stylus ghosting on high-res displays for more tips.
Modify Adobe Illustrator Settings for Smooth Performance
Within Illustrator, optimize settings by disabling GPU acceleration, reducing undo levels, and clearing cache regularly. These tweaks prevent slowdowns and lag during complex vector work. I experienced a hiccup with sluggish lines, but after adjusting the performance preferences, my workflow became fluent again. For detailed configuration steps, visit our guide on reducing Illustrator lag.
Experiment with Stylus Nibs and Grip for Comfort and Durability
Using the right nibs and grip can impact pressure sensitivity and overall response. Opt for fine-tipped, high-quality nibs designed for high-resolution screens—these produce cleaner lines and reduce skip issues. Regularly check nib wear; I replaced mine after realizing worn nibs caused inconsistent pressure response, which was frustrating during detailed shading. Consult our review of the best stylus nibs for 2026 for options tailored to your device.
Implement External Calibration Pads and Accessories
If precision remains elusive, consider external calibration tools like optical calibration pads or specialized stylus testing kits. These devices help map out exact stylus behavior on your screen, allowing you to fine-tune response curves more accurately. During a session, I used a calibration pad, which revealed a slight offset—adjusting based on this feedback rendered my strokes perfectly aligned for the first time. For more advanced calibration techniques, visit our comprehensive calibration guide.Many designers and digital artists believe that investing in the latest high-resolution display and a fancy stylus guarantees flawless performance. However, even top-tier hardware can mislead you if you overlook nuanced details that significantly impact your workflow. For instance, many assume that a 16K display’s sheer pixel density inherently provides better precision, but without proper calibration and understanding of display characteristics, this can actually hinder accuracy rather than improve it. A common myth is that higher resolution automatically yields better results; in reality, ultra-high resolutions demand more from your system’s GPU and stylus hardware, potentially introducing lag or jitter if not managed correctly.
Another trap is focusing solely on the stylus tip itself—thinking that only a ‘best’ nib or grip will improve performance. While these accessories matter, neglecting driver settings and display calibration often leads to persistent issues like stylus jitter or inconsistent pressure sensitivity. Advanced users know that fine-tuning these parameters is crucial. Using professional calibration tools or software, as explained in our guide on calibrating your stylus accurately, can make a universe of difference.
Let’s challenge the notion that all high-res displays are equally viable for creative work. As noted in expert analyses, the benefits of ultra-high resolutions are often offset by the increased demand on system resources and potential display parallax issues—where the stylus appears misaligned with the cursor. This can be exacerbated by poor display ergonomics or inadequate driver support, leading to frustrating offsets during detailed illustration sessions. Therefore, a deep understanding of display technology and real-world calibration practices surpass mere pixel counts.
For example, many overlook the importance of display coating—matte versus glossy—and how it affects stylus friction and accuracy. Matte screens, while reducing glare, can introduce additional resistance that impacts pressure sensitivity, especially on nano-texture surfaces designed for stylus use. Choosing the right screen surface and understanding its trade-offs are often ignored details that can make or break your digital art experience. To explore this topic further, check out our analysis of how matte screens influence stylus wear.
So, what about your setup? Have you ever fallen into this trap of assuming hardware alone guarantees seamless performance? Let me know in the comments, and stay tuned because mastering these nuances can elevate your creative workflow to professional levels. Remember, a well-calibrated system tailored to your specific display and stylus choices makes all the difference—not just the specs on paper.
How Do I Maintain My Creative Setup Over Time?
Maintaining your high-performance design laptop requires a combination of the right tools and consistent habits. I recommend investing in dedicated software like system optimization utilities such as CCleaner or CleanMyMac. These tools help clear unnecessary cache files, manage startup processes, and monitor system health, ensuring your laptop remains responsive during intensive creative sessions. Additionally, regular hardware checks—like inspecting Stylus nibs, cleaning display surfaces, and verifying connection ports—prevent performance hiccups before they become major issues.
Beyond physical maintenance, keeping your software environment updated is critical. I personally schedule monthly checks for driver updates—particularly for stylus support and display drivers—using manufacturer utilities or trusted third-party installers. This approach minimizes driver-related jitter, lag, or calibration drifts that often occur over time. For software performance, optimizing Adobe Illustrator’s settings, such as disabling GPU acceleration when encountering lag, can result in smoother workflow and avoid frustrating delays. Our detailed guide to enhancing Illustrator performance offers step-by-step tips tailored specifically for high-res display users.
Long-term results hinge on proactive monitoring. I recommend keeping a log of system temperatures using tools like HWMonitor—especially for laptops running on ultra-high-resolution displays—as overheating can degrade both performance and hardware lifespan. Setting up automated alerts for thermal thresholds allows quick intervention before thermal throttling slows down your creative projects. The trend for future-proofing involves integrating AI-based diagnostics that can predict hardware failure or performance degradation, which some cutting-edge tools are beginning to incorporate. Staying ahead of these issues keeps your workflow uninterrupted and maintains your investment value.
Scaling your setup as your skills grow is a natural progression. When ready, consider external calibration solutions—like professional colorimeters and stylus testing kits—to fine-tune accuracy. For example, an external calibration pad, combined with software calibration routines, can correct subtle display misalignments that accumulate over time. This is especially important if you work across multiple devices or displays, ensuring consistent output regardless of hardware changes. To explore sophisticated calibration methods, check out our comprehensive calibration guide.
By merging diligent software maintenance with physical hardware care, you ensure that your high-res display, stylus input, and vector tools like Adobe Illustrator perform at their best. Maintaining this balance not only boosts productivity but also extends your equipment’s lifespan. As technology advances, expect AI-driven health monitors and adaptive calibration tools to automate most of these tasks, making it easier than ever to keep your creative workflow seamless. Do yourself a favor and start scheduling monthly system checks—embrace these proactive habits, and you’ll be crafting without hiccups for years to come.
What the Hardest Lesson About High-Res Pen Support Taught Me
Early in my journey, I believed that upgrading to a 16K display and the latest stylus would instantly perfect my digital art. The reality? Without meticulous calibration and driver tweaks, even the top hardware can fall flat. The revelation was realizing that hardware alone doesn’t deliver precision—it’s the fine details in setup that truly elevate creativity.
Uncovering Hidden Myths About Stylus Superiority
Many artists fall for the myth that a fancy stylus or ultra-high resolution guarantees perfection. After extensive experimentation, I learned that optimal calibration, display settings, and accessories like nibs and grips are equally crucial. Recognizing these overlooked factors unlocked a new level of responsiveness and accuracy in my work.
Why Expert Tips on Calibration and Display Settings Are a Game Changer
Implementing targeted calibration routines and display adjustments transformed my workflow. Whether it was reducing jitter or syncing pen pressure, these tweaks made my lines smoother and more natural. Checking out deep dives on stylus jitter fixes and display optimization guides helped me avoid common pitfalls and gain confidence in my setup.
My Go-To Resources for Sharp Stylus Performance
Over the years, I’ve relied on tools and guides that offer practical insights. The Ultimate Guide to Pen Input Performance became a cornerstone, helping me understand driver configurations. Additionally, premium stylus nibs reviews and calibration software from trusted brands provide the reliability I trust to keep my creative flow uninterrupted.
Embracing a Mindset of Continuous Improvement
Your creative potential is endless, especially when you treat your setup as an evolving system. Regularly revisiting calibration routines, experimenting with display modes, and staying updated with the latest driver versions can significantly enhance your stylus experience. Remember, mastery comes with patience and curiosity—so keep tweaking, learning, and pushing your limits. Your high-res display and stylus are tools; with the right care, they become your most powerful allies. What’s one calibration tweak you plan to try today? Let me know below and keep crafting your digital masterpieces.