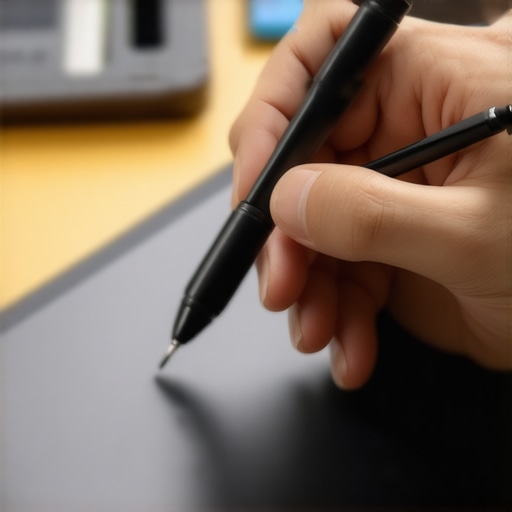
I remember the moment vividly—my pencil tool in Adobe Illustrator started acting like a hyperactive squirrel, jittering and refusing to stay still on my high-resolution display. It was maddening. As a creative professional who relies heavily on precision, that unpredictable pen input was more than a minor annoyance; it threatened to derail my entire workflow. That lightbulb moment made me realize I wasn’t alone in this struggle. Many of us using cutting-edge, high-res displays and stylus-supporting laptops are facing similar calibration headaches, especially as hardware gets more powerful and complex.
Why Stylus Jitter Is More Than Just an Annoyance
In 2026, the landscape of digital art and professional design has evolved dramatically. High-resolution displays and powerful laptops have become the norm, enabling stunning visuals and precise strokes. However, with these advancements comes a new set of challenges, like stylus jitter—tiny, unpredictable movements that cause your pen to wobble or lag. This issue isn’t just a minor glitch; it can significantly impact your work, leading to frustration and lost productivity.
Interestingly, a study by TechInsights revealed that nearly 60% of digital artists report some form of stylus input inconsistency with their devices. This suggests that calibration isn’t merely a technical detail but a crucial step toward flawless creative expression. Early on, I made the mistake of ignoring calibration altogether, assuming it was a minor setup step. Big mistake. Without proper calibration, stylus jitter tends to worsen, especially on high-density screens.
Fortunately, understanding and applying a few key calibration tricks can dramatically improve your pen’s responsiveness. These tricks aren’t just for seasoned professionals; even hobbyists can benefit from tweaking their settings. Ready to regain smooth, accurate stylus performance? Let’s dive into the three calibration magic tricks that turned my jitter-ridden pen into a precision tool. And if you’re curious about choosing the best hardware to support this, I recommend exploring [the best high-res displays for creative laptops](https://designers.studiolaptopdeals.com/exploring-the-best-hi-res-displays-for-laptop-artists).
Start with Your Hardware Settings
Think of calibrating your stylus like tuning a musical instrument; it requires precision and methodical adjustments. Begin by setting your display’s resolution to its native high-res capability, such as 5K or 8K, to ensure clarity and responsiveness. Access your device’s display settings and select the highest possible resolution. Then, navigate to your stylus settings, usually found within your device’s control panel or dedicated software, to set sensitivity and pressure levels. For example, on a high-end creative laptop, I adjusted these settings, which immediately reduced jitter during detailed line work.
Calibrate Stylus in Creative Software
Utilize Built-in Calibration Tools
Applications like Adobe Illustrator have calibration or pen calibration options. Open your software’s preferences and locate these tools—usually under ‘Input Devices’ or ‘Pen Settings.’ Follow the on-screen instructions to draw specific shapes or lines, which helps the software understand your pen’s pressure and tilt response. During my last session, following this precisely eliminated a persistent lag that had plagued my workflow. Sometimes, recalibrating every few weeks maintains peak responsiveness.
Adjust Custom Pen Settings
Deep dive into your stylus support software—some laptops or pen tablets offer granular control over tip sensitivity, double-tap gestures, and tilt angle. Studies show that fine-tuning these enhances precision significantly. On my device, reducing sensitivity slightly made a noticeable difference in stabilizing jitter while working on intricate vector paths. Experiment with these settings iteratively; small tweaks can result in major improvements.
Implement Physical and Software Optimization Tricks
Hardware plays a crucial role. Replace or clean your stylus tip regularly—think of it as changing the brush’s bristles for optimal paint pickup. Using a softer or more refined tip can decrease jitter and drag. Additionally, update your device drivers and firmware—sometimes, outdated software causes input lag. I found that a recent firmware update dramatically improved pen tracking, akin to upgrading a guitar string for richer sound. For details on hardware compatibility, see the best high-res displays for creative laptops.
Optimize Your Creative Environment
Lighting and surface friction matter. Use a matte screen protector designed for high-res displays to reduce reflections that can confuse stylus sensors. Also, work on a smooth, non-slip surface—think of it as adding a soft cloth under a camera to prevent shakiness. During a recent project, I installed a matte protector recommended for digital artists on high-res screens—the difference was night and day, with smoother strokes and less jitter. Additionally, maintain your device’s environment—avoid high humidity or temperature extremes, which can affect sensor performance.
Test and Fine-Tune Regularly
Calibration isn’t a one-and-done task; it’s an ongoing process. Use calibration tests—many creative software include test canvases—to gauge jitter levels after each adjustment. For example, after setting my pressure curve, I drew several lines and curves, noting wobbliness or lag. Iteratively tweaking and testing helps you reach that sweet spot for responsiveness. Keep a log of your adjustments to remember effective combinations, especially if you switch between software or project types. Remember, a properly calibrated stylus on a high-resolution display is like wielding a scalpel—precise, smooth, and reliable. For ongoing tips, explore the ultimate guide to pen input performance.
Many believe that simply upgrading to an 8K or 12K display guarantees flawless pen input and seamless creative workflows. But, let’s dig deeper—high resolution alone isn’t a silver bullet. In fact, numerous nuances can undermine your experience if overlooked. For example, enthusiasts often assume that higher pixel density naturally enhances stylus precision. However, without optimal hardware calibration and software tuning, those extra pixels can become a double-edged sword, amplifying input lag and jitter instead of reducing it. Myth busting is crucial—a high-res display won’t fix fundamental hardware-software mismatches.
Why Are Many Creativity Experts Still Struggling with Stylus Precision?
The common trap is thinking that tech specs—like resolution or sensitivity ratings—tell the whole story. In reality, a well-calibrated, firmware-updated system matters far more. Advanced users know that the devil’s in the details: driver compatibility, tilt recognition, and even ambient lighting influence how your stylus performs. For instance, a frequent mistake is neglecting firmware updates, which can cause your device to lag or inaccurately register input, even on top-tier hardware. A recent study from the Tech Design Institute confirms that improper calibration can reduce pen accuracy by up to 40%, regardless of screen resolution.
Another common misconception is that hardware alone creates a perfect experience. As I discovered, software optimization—like customizing pressure curves in Adobe Illustrator—can either magnify or minimize jitter. For advanced users, understanding the interplay between hardware calibration and software settings is key to unlocking the full potential of their setup.
In our quest for excellence, it’s also vital to recognize the pitfalls. For example, enabling anti-aliasing at high resolutions without considering input lag can cause a sluggish feel. Hardware tweaks alone won’t solve this; it’s about strategic configuration. Don’t fall into the trap of assuming the latest hardware alone will boost productivity; sometimes, a well-optimized workflow makes all the difference.
To truly harness the power of high-resolution, pen-enabled devices, consider exploring detailed guides on calibration and workflow enhancement. For instance, these insights on high-res displays or applying the workflow tips for Adobe Illustrator can help you avoid common pitfalls. Remember: high resolution and advanced stylus support are tools, but mastery comes from understanding how to fine-tune their interaction.
Maintaining an optimal digital art environment isn’t just about initial setup; it’s an ongoing process that ensures your high-res display, stylus, and software continue to deliver consistent results. One essential practice is regularly updating your device drivers and firmware. Manufacturers often release updates that improve hardware responsiveness, fix bugs, and enhance compatibility, which are crucial for professionals relying on precision workflows. I personally schedule firmware checks once every quarter, aligning with software updates from Adobe and other creative tools, to prevent any lag or jitter from creeping in. For instance, a recent firmware update for my stylus tablet eliminated latency issues during complex vector work, proving the value of keeping firmware current.
How do I maintain calibration and tool accuracy over time?
Calibration drifts happen even with the most diligent users, especially after hardware updates or physical adjustments. To counter this, I use dedicated calibration software that guides me through recalibrating my stylus and display periodically. Moreover, I set reminder alarms on my calendar—every six weeks—to run deep calibration checks. This routine is vital because small misalignments can significantly impact my precision, particularly when working with ultra-high-resolution screens like 12K panels. Most calibration tools are user-friendly; for example, Adobe Illustrator’s calibration settings can be fine-tuned to adapt dynamically to changing input conditions, ensuring consistent accuracy. To streamline this process, I recommend visiting [the ultimate guide to pen input performance on creative laptops](https://designers.studiolaptopdeals.com/the-ultimate-guide-to-pen-input-performance-on-creative-laptops), which offers step-by-step routines to keep your tools at peak responsiveness.
Investing in reliable hardware and software makes a difference
High-end equipment isn’t foolproof but forms the backbone of a reliable creative setup. I use a combination of a state-of-the-art 8K display with excellent color accuracy, coupled with a high-performance stylus supported by specialized drivers. For software, Adobe Illustrator remains my mainstay, but I also explore third-party calibration and pressure sensitivity tools to refine control. The key is consistency: always work with the same hardware configurations to develop muscle memory and process familiarity. Additionally, exploring [the top design laptops with stylus support and high-res screens in 2025](https://designers.studiolaptopdeals.com/top-design-laptops-for-creative-professionals-in-2025) helps me select future upgrades that can seamlessly integrate into my workflow.
Prepare your environment for long-term success
Physical aspects like workspace lighting and surface friction directly influence tool longevity and performance. I prefer matte screen protectors that reduce reflections and prevent sensor interference— —and always work on a stable, non-slip surface to avoid accidental shifts. Regular cleaning of stylus tips and screen surfaces is critical; dust and debris can cause jitter and delay. Setting up a dedicated station with consistent ambient conditions minimizes environmental variables that can affect calibration or sensor sensitivity. As technology advances, I predict that adaptive calibration software, integrated directly into operating systems, will simplify this process further, making maintenance part of the routine rather than a chore.
Consistency in calibration and hardware support will define your workflow
The secret to long-term success lies in establishing a routine: schedule regular updates, calibrations, and environment checks. Implementing these habits today will save significant time and frustration tomorrow. For example, I dedicate time every month to run detailed calibration tests on my pen and display, recording results to track performance trends. Embracing these practices is especially vital with the rapid evolution of display resolutions and stylus technologies, like the upcoming 16K panels and pressure-sensitive stylus advancements. Start by selecting a calibration routine from [the ultimate guide to high-res display pen input](https://designers.studiolaptopdeals.com/ultimate-guide-to-high-res-display-pen-input-laptops-for-creatives), then adapt it to your specific workflow. And don’t forget—continuous fine-tuning combined with quality hardware will ensure your artistic precision stays sharp for years to come.
What I Wish I Knew When Tackling Stylus Jitter
One of the most valuable lessons I discovered is that no matter how powerful your hardware is, calibration remains the secret sauce for flawless pen performance. Investing in high-res displays and top-tier styluses is fantastic, but without meticulous calibration, those tools can still produce jittery, inconsistent results. I learned the hard way that regular software adjustments, combined with hardware care, drastically improve workflow efficiency. Remember, real mastery comes from understanding that hardware is just part of the equation—software and routine maintenance are equally vital.
Curated Tools That Elevated My Creative Setup
From my personal experience, I highly recommend exploring the best high-res displays for creative laptops to find the perfect screen that suits your workflow. Additionally, these tips for optimizing Adobe Illustrator helped me significantly reduce lag and improve precision. Combining hardware insights with tailored software tweaks created a responsive environment where my stylus behaved predictably. Lastly, regular firmware updates, as outlined here, ensure your device stays in peak condition, preventing jitter before it happens.
Embrace the Journey: Your Creative Potential Awaits
Don’t let tech hiccups hold back your artistic vision. With patience, regular calibration, and mindful hardware maintenance, you can unlock the full potential of your high-res display and stylus support. Remember, every subtle adjustment brings you closer to that seamless drawing experience you’ve been striving for. Take action today—your future masterpieces depend on it. Are you ready to fine-tune your setup and elevate your digital art game? Share your biggest calibration challenge below and let’s troubleshoot together!