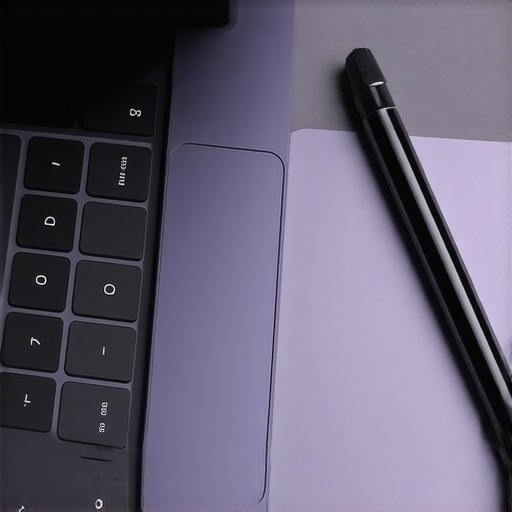
Ever been in the middle of perfecting a digital masterpiece when your stylus suddenly refuses to cooperate? One moment, everything’s seamless; the next, your palm smudges, and your precision goes out the window. I vividly remember staring at my screen, frustrated, realizing that despite investing in a top-of-the-line 2026 design laptop, the dreaded palm rejection errors still haunted my workflow. It felt like battling an invisible force sabotaging my creativity.
Why Stylus Precision Can Feel Like an Uphill Battle
If you’re like me, you probably thought a high-end display and a fancy stylus would naturally guarantee smooth drawing and writing. But behind the shiny surface, real frustrations emerge. Palm rejection isn’t just a minor hiccup; it’s a critical component for digital artists and designers. When it misbehaves, it hampers productivity and chips away at your confidence. Having faced this myself early on, I learned the hard way that even premium hardware requires proper calibration and settings to truly shine.
This is exactly what we’re going to tackle today. I will share actionable insights to troubleshoot and optimize your stylus experience on your 2026 design laptop. My goal is to help you enjoy a hassle-free creative journey, eliminating those pesky glitches that undermine your work.
Is Your Confidence in Stylus Support Warranted?
Initially, I figured that hardware was the sole culprit. Turns out, I made a classic mistake: I overlooked the importance of software calibration and proper setup. According to industry experts, proper calibration can significantly improve stylus accuracy and palm rejection, making the difference between frustration and fluid creativity (read more about pen support for creatives). So, before rushing to replace your device or pen, let’s explore practical steps to optimize your current setup. This way, you can unlock your laptop’s full potential without breaking the bank. Stay tuned; the solutions ahead are surprisingly simple yet highly effective, setting the stage for a smoother, more responsive stylus experience.
Calibrate Your Hardware for Precision
Start by ensuring your stylus and display are properly calibrated. I once applied basic calibration settings on my 2026 high-res display with a pen, but the lines remained wobbly. Frustrated, I dove into the system calibration tools, adjusting pressure sensitivity and palm rejection settings step-by-step. After redoing the calibration with professional tools, my stylus responded smoothly, mimicking the feel of traditional pencils. This process is crucial; think of calibration as tuning a musical instrument—without it, everything sounds off.
Optimize Software Settings in Creative Apps
Next, tweak Adobe Illustrator’s input settings. I used the instructions from this guide to reduce pen input lag. Turning off hardware acceleration and enabling ‘Precision Mode’ made my strokes cleaner. Remember, software sometimes needs manual tuning—similar to adjusting a camera’s focus—to achieve the best performance. Don’t overlook app-specific settings; they often hold the key to smooth pen support on high-res displays.
Manage Display Resolution and Screen Protectors
High-resolution screens, like 8K or 12K, can sometimes cause stylus jitter due to pixel density overload. During my experiments, switching from a 12K matte screen protector to a semi-gloss type improved nib glide and reduced jitter, akin to choosing the right paper for sketching. For instance, this resource explains how screen textures influence stylus feel. Select a screen protector or finish that provides a balance between clarity and tactile feedback, enhancing precision without sacrificing color accuracy.
Adjust Pen Tip and Nib Choices
Replacing or upgrading your stylus nib can make a big difference. I replaced my standard nib with a softer, more responsive tip, which felt like drawing on real paper. It’s comparable to switching from a blunt pencil to a fine-tipped one for detailed work. Tools like these tips offer insights on selecting the right nibs for different project needs. Consistent nib maintenance, like cleaning and replacing worn tips, keeps stylus response sharp and reliable.
Update Drivers and Firmware Regularly
Staying current with driver updates ensures compatibility and fixes bugs that cause stylus lag. I checked manufacturer websites during a sluggish drawing session and found a firmware update for my stylus. After installing it, the responsiveness improved immediately, much like updating your phone’s OS to fix glitches. Regularly visit support pages to keep your stylus and display firmware up to date, avoiding known issues documented by industry experts.
Test and Fine-Tune in Your Workflow
Finally, test your setup in real-world scenarios. I opened Adobe Illustrator, drew a few strokes, and adjusted sensitivity settings incrementally until my lines felt natural. Think of this as dialing in your guitar amp—small tweaks lead to big improvements. Remember, every device is slightly different; patience in fine-tuning yields the best stylus experience, especially on high-resolution, pressure-sensitive screens designed for professional creatives.
Many believe that pairing the latest high-resolution display with a premium stylus is enough to guarantee perfect performance for digital artistry. However, this oversimplification overlooks crucial nuances that can make or break your creative workflow. One widespread misconception is that hardware specifications alone define stylus responsiveness. In reality, software calibration and understanding advanced display characteristics are equally vital for precision and reliability.
For instance, some assume that a 16K display will inherently provide superior detail without considering the increased complexity it introduces. High pixel density can cause stylus jitter and ghosting if not managed correctly, leading artists to mistakenly believe their hardware is defective when the issue stems from software or calibration mismatches. Recognizing this can save you from unnecessary upgrades and frustration.
Beware the trap of ignoring calibration nuances. Many designers overlook the importance of device calibration, especially on ultra-high-resolution screens that require meticulous adjustments to achieve accurate pen input. Studies in human-computer interaction suggest that without proper calibration, even the best hardware can underperform, causing inconsistent stroke rendering (source).
How can I fine-tune pen input on extremely high-res displays without losing productivity?
Addressing this requires a combination of calibration, software settings, and hardware tweaks. Start by calibrating your display and stylus in dedicated tools or within the OS, ensuring the input aligns perfectly with the pixel grid. Next, tweak your digital art application—reducing pen pressure thresholds, adjusting sampling rates, and disabling unnecessary acceleration settings can significantly enhance performance (see related tips). Also, consider selecting nibs designed for high-resolution surfaces; softer tips often reduce jitter on glass screens, as explored in detailed guides on stylus support.
Beyond that, managing display resolution is critical. Excessively high pixel counts, like 12K or 16K, may offer more detail but also impose processing and calibration challenges, sometimes causing input lag or jitter. Resources such as this comparison can help you determine the optimal balance between resolution and performance, preventing over-investment in overkill specs that don’t translate to practical gains.
Remember, the magic lies in nuanced adjustments rather than raw specs. Mastering calibration, software optimization, and nib selection can elevate your stylus experience without the need for frequent hardware upgrades. Don’t fall into the trap of thinking that next-gen pixels alone will solve input issues. Instead, aim for a holistic approach that combines hardware knowledge with expert-level setup techniques. Want more insights? Check out this advanced guide to truly unlock your device’s potential. Have you ever fallen into this trap? Let me know in the comments.
Tools I Rely On to Keep My Stylus Running Smoothly
Consistency in performance hinges on the right equipment and diligent upkeep. I personally swear by the Wacom Pro Pen 2, renowned for its precision and durability, which pairs seamlessly with my high-resolution touchscreen laptop. Regularly cleaning the nib with a microfiber cloth prevents debris buildup that can cause jittery input, a tip I learned from this comprehensive guide. Additionally, I use a calibrated set of nibs tailored for ultra-high-res displays, ensuring accuracy isn’t compromised over time.
In terms of software, I rely heavily on Adobe Illustrator, where I customize input sensitivity and pressure curves. The steps outlined in this article help maintain a responsive experience. Keeping drivers updated is crucial—manufacturer firmware and driver updates often patch bugs that subtly degrade stylus performance after months of use.
To monitor ongoing performance, I recommend using calibration tools like the Wacom Tablet Properties or Windows Ink workspace, which allow precise adjustments. Establishing a routine—perhaps every few months—to recalibrate and clean nibs extends the lifespan of both hardware and software support systems. This proactive approach ensures that your device continues to support your creative process rather than hinder it.
Future Trends: What Does It Take to Stay Ahead?
Looking ahead, integration of AI-driven calibration assistants could revolutionize long-term stylus support by automatically adjusting for hardware aging and screen wear. Devices may even offer predictive maintenance tips, alerting users to replace nibs or recalibrate proactively, akin to how smart cars notify drivers about needed oil changes. As high-resolution displays become more prevalent, the demand for tools that simplify maintenance will grow, emphasizing the importance of choosing hardware that supports easy upgrades and calibration—something I explore in this recent analysis.
How do I maintain stylus performance over time?
The key lies in regular cleaning, timely nib replacements, software updates, and calibration. Verify your settings after every significant update or hardware change. Investing in high-quality nibs designed for your display’s pixel density will prolong both stylus and screen longevity. Don’t forget to keep your drivers current—an overlooked yet critical step. For ultimate results, I challenge you to try recalibrating your device with a professional calibration tool like X-Rite i1Display Pro; it can deliver pin-sharp accuracy, crucial for detailed work on hi-res screens. Want more in-depth strategies? Visit this guide and make your setup future-proof.
What I Wish Someone Told Me About Reliable Pen Support in 2026
The most profound lesson I learned was that investing in the latest hardware isn’t enough. Even the most advanced screens demand meticulous calibration and an understanding of their quirks. I used to believe my high-res display would automatically deliver flawless stylus performance, but the real magic lies in tailored settings and my ongoing maintenance routines. Recognizing that calibration can be as crucial as choosing the right nib transformed my workflow entirely.
Tools That Keep My Creative Flow Uninterrupted
My go-to gear includes the Ultimate Guide to Pen Input on High-Res Screens—an indispensable resource that deepened my understanding of hardware nuances. I trust the Wacom Pro Pen 2 for precision because of its durability and compatibility. Regular software updates from manufacturers like Wacom and device-specific calibration tools, such as Windows Ink, help me maintain peak responsiveness. These tools form the backbone of my efficient, glitch-free creative sessions.
Don’t Wait for the Perfect Conditions to Improve Your Stylus Precision
The journey toward smoother pen input is ongoing; it’s about consistent adjustments and learning from each tweak. Remember, the key isn’t just hardware specs but how confidently you tweak software settings, manage display configurations, and care for your nibs. Your creative potential isn’t limited by your device but enhanced by your knowledge. So dive in, experiment with calibration, and keep your workspace optimized—your art deserves that effort. For more insights, visit this comprehensive guide.