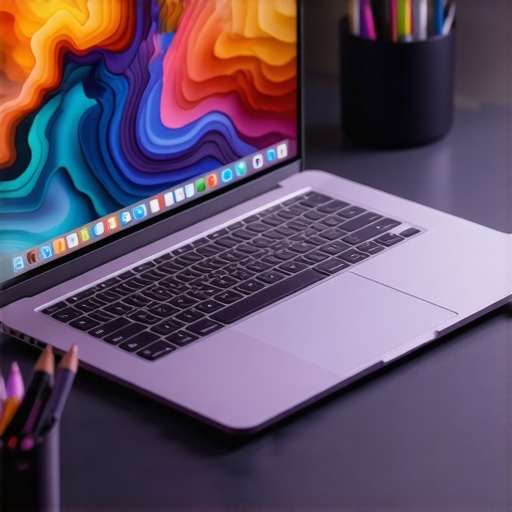
I vividly remember the first time I tried to create digital art on a laptop that just didn’t cut it. The colors looked dull, the screen felt like looking through a foggy window, and the pen input was laggy enough to make me want to throw my device across the room. That frustrating experience was a lightbulb moment for me. I realized that for artists like you and me, the hardware isn’t just a tool—it’s the canvas itself. If your laptop’s display isn’t sharp enough or your pen input isn’t precise, your creativity gets stifled right at the start.
Why High-Res and Pen Support Matter More Than Ever
Today, I want to share how investing in the right laptop can transform your workflow. High-resolution screens with accurate color reproduction and stylus support aren’t luxuries—they’re essentials for digital art. They help you see your work clearly, with true-to-life details, and make your digital brushes feel more natural. Yet, with so many options out there, choosing the perfect device can be overwhelming. That’s where this guide comes in.
Have You Faced This Problem?
If you’ve ever struggled with blurry visuals, color inaccuracies, or laggy pen input, you’re not alone. Early in my journey, I made the mistake of choosing a laptop based on specs alone—forgetting that real-world performance, especially for creative work, depends on a combination of display quality, pen support, and build comfort. Trust me, that mistake cost me precious time and frustration. For a detailed look at what makes a great creative laptop, check out this comprehensive guide.
So, if you’re tired of squinting at dull screens or battling laggy styluses, stick around. We’ll explore the key features to look for and I’ll help you find a device that unlocks your full artistic potential.
Choose the Right Display Size
Start by selecting a display size that balances portability and workspace. A 15-inch screen offers portability without sacrificing much workspace, while a 17-inch or larger provides more room for detailed work. When I upgraded from a 13-inch to a 15-inch laptop, I immediately noticed how much easier it became to work on complex illustrations without zooming in constantly. Remember, a larger screen reduces eye strain and allows you to see more detail at once.
Prioritize Resolution and Color Accuracy
Look for a laptop with at least a 1920×1080 (Full HD) display, but ideally 2560×1440 (QHD) or higher. Higher resolution means sharper details, akin to switching from a blurry photo to a high-definition image. Color accuracy is equally critical; seek out screens covering 100% sRGB or AdobeRGB. I once selected a laptop with a high resolution but poor color coverage, which made my colors look off when I printed. After switching to a device with better color support, my digital work looked consistent across screens and print.
Verify Panel Type and Brightness
Opt for IPS panels over TN or VA for better color consistency and viewing angles. A brightness of 300 nits or more ensures visibility even in well-lit environments. I tested a TN panel for a project, but the colors looked washed out when viewed from different angles. Upgrading to an IPS panel made a significant difference, especially when working outdoors or in bright rooms.
Ensure Pen Support Meets Your Needs
Not all laptops support stylus input equally. Check if the device supports Wacom, AES, or Microsoft Pen protocols, depending on your stylus of choice. I initially bought a laptop without proper pen support, which resulted in lag and jittery lines. After researching and choosing a device compatible with my stylus, my drawing experience improved dramatically. For in-depth details, explore this guide.
Test Pen Latency and Pressure Sensitivity
Visit a store if possible, and test the stylus latency and pressure sensitivity. Latency above 10ms can cause noticeable lag, disrupting your workflow. When I tested a few models, I found that a latency of under 5ms felt almost like drawing on paper, providing a natural feel. Higher pressure sensitivity allows for dynamic strokes, essential for detailed shading and line work.
Color Calibration and Screen Quality
Calibrate your display regularly using professional tools or software to ensure color accuracy. I calibrated my laptop using a colorimeter, which improved the fidelity of my colors and made my digital art more consistent. Many professional artists recommend calibrating every few months to maintain precision. Also, consider screens with matte finishes to reduce glare during long sessions.
Explore Your Options with Expert Recommendations
For the best choices tailored to digital art, check out this curated list. It highlights laptops that combine high-resolution screens with stylus support, perfect for creative professionals. Remember, investing in the right hardware directly impacts your ability to work efficiently and creatively.

Many artists and designers fall into a common trap when choosing their digital art laptops: they assume that higher resolution and better color support are sufficient, but overlook the nuanced aspects that truly impact workflow and output quality. Let’s dig deeper into what most people get wrong about display quality, especially for creative professionals.
Why More Pixels Might Not Mean Better Artistry
It’s tempting to think that a 4K or higher resolution screen automatically guarantees sharper images and more detailed work. However, if the panel’s color accuracy, gamma, and calibration aren’t up to par, those extra pixels won’t translate into better art. I’ve seen artists invest heavily in high-res screens only to be disappointed when their colors look off or prints don’t match on-screen work. Remember, resolution is just one piece of the puzzle; without proper color calibration and professional-grade panels, your work can suffer from mismatched hues and loss of detail.
The Danger of Overlooking Panel Technology and Brightness
Many assume that IPS panels are universally better, but not all IPS screens are created equal. The quality of the backlight, color uniformity, and contrast ratio matter significantly. I once used a laptop with an IPS panel that had uneven lighting, causing color inconsistencies across the display. Additionally, a screen’s brightness—ideally above 300 nits—is vital when working in various lighting environments. A dim display can strain your eyes and cause you to misjudge colors. For detailed work, investing in a calibrated panel with high contrast and brightness ensures your art looks consistent, regardless of ambient lighting.
Common Myths About Stylus Latency and Pressure Sensitivity
Many believe that the latest stylus technology automatically guarantees a natural drawing experience. But, in reality, latency and pressure sensitivity are hardware and software issues that can be overlooked. For example, a stylus with high pressure sensitivity is meaningless if the device’s latency causes noticeable lag. This is a trap many fall into—buying a device based solely on specs without testing the actual drawing feel. For advanced workflows, I recommend testing latency and pressure response firsthand or consulting detailed reviews, like this comprehensive guide.
Are You Using the Right Calibration Tools?
One of the most overlooked nuances is display calibration. Even the best screens can drift in color accuracy over time. Many artists neglect calibration, leading to inconsistent colors between screens or prints. Using a professional colorimeter and software to calibrate your display regularly (every few months) can prevent these issues. It’s a step that separates amateur work from professional-grade output. If you’re serious about color fidelity, explore these high-quality calibration tools.
In conclusion, don’t fall for the illusion that bigger, higher-res screens automatically improve your digital art. Instead, focus on the holistic quality of the panel, proper calibration, and testing hardware performance. These nuances make a tangible difference in your creative process and the final output. Have you ever fallen into this trap? Let me know in the comments!
Once you’ve invested in the perfect laptop for digital art, the next step is ensuring it stays in top shape over time. Regular maintenance not only prolongs your device’s lifespan but also keeps your workflow smooth and your colors vibrant. Today, I’ll share specific tools and methods I personally use to keep my art setup functioning seamlessly, along with insights into future trends.
How do I maintain my creative tools over time?
First and foremost, software updates are your friends. I always ensure my operating system, graphics drivers, and creative applications like Adobe Photoshop or Illustrator are up-to-date. This practice patches security vulnerabilities, improves compatibility, and often introduces performance enhancements. For example, recent updates to Adobe’s software have optimized pen input responsiveness, making my drawing experience more natural. You can check out this guide for tips on optimizing your workflow.
Hardware calibration is equally vital. I rely on a professional colorimeter like the X-Rite i1Display Pro, which I use every few months to recalibrate my display. Proper calibration ensures that what I see on screen matches my prints and client expectations. Additionally, I use screen cleaning kits designed for delicate displays to prevent dust and smudges that can distort colors.
Tools I swear by for longevity and performance
One of my favorite tools is the CCleaner software, which I run weekly to clear temporary files and optimize system performance. Also, I schedule regular disk checks and backups—using cloud services like Google Drive or Dropbox—so I never lose progress due to hardware failure. These practices keep my system running smoothly, especially during intensive tasks such as rendering high-resolution images.
Physical maintenance should not be overlooked. I clean my laptop’s vents with compressed air every few months to prevent overheating, which can degrade performance and hardware lifespan. Investing in a good anti-glare screen protector also helps reduce eye strain during long creative sessions and protects the display from scratches.
Preparing for the future of digital art tools
Looking ahead, I predict that AI-powered calibration tools and smarter hardware diagnostics will become standard, making maintenance even easier. Already, some devices now offer built-in diagnostics that alert you when performance dips or hardware needs servicing. Staying ahead means embracing these innovations and consistently using reliable tools.
I encourage you to try implementing a regular calibration routine with a professional colorimeter, as it’s a game-changer for maintaining color fidelity. Also, consider automating software updates and backups to save time and reduce stress. These small but impactful steps ensure your digital art environment remains reliable for years to come.
If you’re interested in more advanced tips, explore this resource on high-res displays to select equipment that ages gracefully with proper care. Remember, a well-maintained setup is the foundation of consistent, high-quality digital art.
Throughout my journey as a digital artist, I’ve learned that the right hardware can elevate your creative process in ways you never imagined. The key lessons I’ve picked up revolve around understanding that not all screens are created equal and that proper calibration, combined with the right pen technology, can make or break your work. One of the hardest lessons was realizing that a high-resolution display alone isn’t enough—color accuracy, panel quality, and proper calibration are equally vital. Missing these details can lead to frustration, with colors that look great on-screen but falter in print or when shared with clients.
Another insight I wish I’d known earlier is that stylus latency and pressure sensitivity are often overlooked but are essential for a natural drawing experience. Many artists assume that the latest stylus technology automatically guarantees smooth strokes, yet hardware performance and calibration play a major role. I’ve also discovered that investing in tools like a professional colorimeter and routine calibration can keep your colors consistent over time, saving you from headaches and inconsistent results. These lessons have shaped my understanding that your hardware setup must be seen as a long-term investment, not just a quick purchase.
My Essential Toolkit for Digital Art Success
When it comes to choosing the best tools, I rely heavily on trusted resources. For high-resolution displays with accurate color reproduction, I recommend exploring this curated list of top laptops designed for digital artists. For optimizing pen input performance, this guide offers detailed insights into latency, pressure sensitivity, and compatibility. Lastly, I trust these stylus support tips to ensure my workflow remains smooth and responsive. These tools and resources have transformed my approach and can do the same for you.
Embrace the Future of Digital Art with Confidence
Now, it’s your turn to take action. Whether you’re upgrading your current device or investing in a new one, remember that the right hardware—one that combines high-res screens, accurate color support, and seamless pen input—can unlock new levels of creativity. Don’t let subpar equipment hold you back from realizing your artistic vision. Dive into research, test your gear, and calibrate regularly to keep your work consistent and vibrant. The future of digital art is bright, and with the right tools, you’re ready to make your mark.
What’s the biggest challenge you’ve faced when selecting a digital art laptop? Share your experience below—I’d love to hear your story and help you find solutions!
Reading this post really resonated with my own experience. I once purchased a laptop mainly for its high resolution, only to find out that the color coverage was far from accurate, which made my digital paintings look dull and mismatched when printed. It taught me that resolution alone isn’t enough; color fidelity and calibration are equally, if not more, important. The tips about using professional calibration tools like a colorimeter are especially helpful—it’s an investment that pays off in the consistency of my work. I’ve also noticed that even with the perfect display and stylus, testing pen pressure sensitivity and latency in-store or through thorough reviews makes a big difference in achieving natural strokes. When you’re working on intricate details or shading, slight lag or insufficient pressure sensitivity can really disrupt the flow. Does anyone have recommendations for budget-friendly calibration tools or monitors that offer good color accuracy without breaking the bank? Would love to hear about your go-to gear or tips for maintaining display quality over time.
This post really hits close to home for me. I used to think that investing in a high-resolution display was enough to elevate my digital artwork, but I quickly realized that without proper color calibration and a high-quality panel, my work didn’t truly shine. I’ve been using a colorimeter like the X-Rite i1Display Pro for a few years now, and the difference it makes is astonishing. Colors are more consistent across my devices and prints, which is vital for professional work. One challenge I encountered initially was finding calibration tools that were affordable but still effective—especially for hobbyists or those new to digital art gear. After some research, I found that even budget-friendly options can give decent results if used regularly. How do others here keep their displays calibrated without breaking the bank? Also, I’ve noticed that working with screens that have an anti-glare matte finish significantly reduces eye strain during those long creative sessions. Curious—what calibration routines and tools do others swear by for maintaining color fidelity over time?