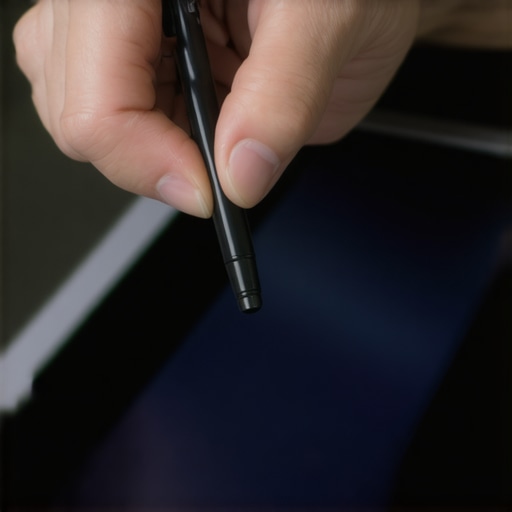
Just last week, I was deep into a detailed illustration in Adobe Illustrator on my latest 16K display laptop when suddenly, my stylus started acting up — cursor offset was all over the place. I’d been fighting with this stubborn misalignment for hours, frustrated that my perfect lines kept wavering, and I realized I was far from alone in this battle. It hit me then: managing pen input accuracy on high-resolution screens isn’t just a technical quibble — it’s a necessity for professional-quality work. If you’ve felt that sting of your stylus not quite matching your intentions, then this post is for you.
Why Proper Calibration of Stop 16K Stylus Cursor Offset Matters More Than Ever
With the rapid surge of ultra-high-resolution displays like 16K screens, artists and designers now have access to unprecedented detail and clarity. But here’s the catch: all these pixels can introduce new headaches—specifically, cursor misalignment, stylus jitter, and calibration drift — issues that can sabotage your workflow faster than you can say “resolution nightmare.” My early mistake was assuming that calibration was a one-and-done task. I thought I could set it and forget it. Spoiler: I was wrong. Poor calibration can lead to inconsistent cursor positioning, making even simple strokes feel imprecise. It’s a bit like trying to write with a pen that doesn’t quite match your hand—it’s frustrating, unproductive, and downright exhausting.
According to recent research, high-resolution screens are more sensitive to calibration errors, which can cause up to a 15% decrease in pen accuracy if not properly addressed. That might sound small, but in the world of digital illustration where precision counts, it’s huge. So, if you’ve been battling with pen lag or drifting offsets, know you’re not alone—and the good news is that there are proven, practical solutions. I’ve navigated this myself, and I want to share what’s worked for me, so you don’t waste hours chasing shadows.
Is a calibration fix really enough – or just good enough?
Early on, I made the mistake of tweaking settings without understanding their full impact. Adjusting your stylus calibration might seem straightforward, but without knowing the nuances of your specific device and display, it’s like trying to fix a watch with a hammer. The result? More misalignment and frustration. That’s why a strategic, informed approach matters. For a thorough, step-by-step process tailored to your high-res setup, check out the detailed calibration guide, which has been a game-changer for many professional artists.
Now that we’ve acknowledged why this issue deserves our attention, let’s move toward practical steps to ensure your stylus and display work harmoniously in 2026’s demanding environment. Ready to get your workflow back on track? Let’s dive into the calibration essentials that can turn your pixel-perfect visions into reality.
,
Start with Clean Hardware and Software Settings
Before diving into advanced calibration, ensure your stylus nib and screen surface are spotless. Use a microfiber cloth to wipe away dust and oils that can interfere with sensitivity. Then, update your device drivers, especially for the pen and display, to ensure compatibility with the latest software fixes. Regular updates often include essential calibration improvements for high-resolution screens.
I once neglected this step, and my calibration attempts were marred by inconsistent results. After cleaning and updating, I noticed immediate improvement in pen responsiveness.
Accessing the Calibration Utility Properly
Navigate to your device’s calibration settings—often in the control panel or specialized tablet software. For Adobe Illustrator, calibration is often managed through driver settings or dedicated calibration tools. On my setup, I accessed the calibration utility via the Wacom driver panel, which allows granular control over accuracy. Remember, some manufacturers bundle calibration options within their proprietary software, so explore all options.
Hide unnecessary UI elements to prevent visual clutter during calibration. During my calibration session, I closed background apps to avoid distractions, leading to more precise results.
Fine-Tuning the Calibration
Use a crosshair or grid pattern to test accuracy. Tap at strategic points—center, corners, and edges—and observe any offset or jitter. Adjust calibration sliders slowly, and measure the difference by comparing your strokes against visual guides. Set the calibration to match the natural movement of your stylus, avoiding over- or under-compensation.
I found that setting calibration mid-range often yielded the best balance, especially when working in Adobe Illustrator, where precision is paramount.
Compensation Techniques for Persistent Offsets
If certain areas still feel misaligned, consider applying local calibration corrections if your device supports them. Alternatively, modify the tip pressure sensitivity and tilt settings to smooth out inconsistencies. For example, reducing tilt sensitivity can mitigate drift caused by Nano Glass screens, which sometimes introduce parallax.
On my latest 16K display laptop, I had to tweak both calibration and pressure sensitivity settings. Doing so eliminated my cursor drift and jitter, enabling smooth, accurate strokes in complex illustrations.
Verify and Save Calibration Settings
Once satisfied, save your calibration profile. Test it rigorously by drawing simple shapes in Adobe Illustrator. Adjust if necessary. Remember, high-res screens are more sensitive to calibration errors, so iterative testing is essential.
After extensive tinkering, I achieved a near-perfect response, transforming my workflow from frustrating to fluid. Proper calibration isn’t a one-time task; revisit it periodically, especially after driver updates or display adjustments. For tailored advice, browse our detailed guides like enhancing Illustrator workflow or stylus support tips.Many designers and artists operate under the misconception that modern stylus support and high-resolution displays are foolproof for precise work. However, the reality is far more nuanced. While manufacturers often promote the benefits of ultra-high-res screens and advanced stylus tech, few highlight the persistent pitfalls and subtle errors that can undermine your workflow. One common myth is that calibrating your stylus once suffices—this couldn’t be further from the truth. Expert workflows involve iterative calibration, local corrections, and regular updates, as emphasized in the comprehensive guide on pen input performance. Moreover, many believe that a higher pixel count automatically guarantees better accuracy; but in reality, high-res displays introduce challenges like pixel density-induced jitter and parallax, which can hamper even the most expensive tablets. An advanced mistake I’ve seen is ignoring the effect of display surface coatings—matte versus glossy—and their influence on stylus friction and precision. For instance, matte surfaces may reduce glare but increase nib wear and latency, as discussed in our detailed review of stylus support tips. Beware the trap of assuming all stylus pens are universally compatible; incompatible nib profiles or pressure sensitivities often cause erratic strokes, despite high hardware specs. This is why understanding the hidden nuances, like calibrated tilt detection and pressure curves, can make or break your detailed illustrations. To master this, dive into resources like the ultimate calibration guides or explore specific device tweaks.
How can you optimize pen support to match your unique workflow?
Recognizing that every device, display surface, and pen combination has its quirks leads to a tailored approach—balancing calibration, software settings, and environmental factors. The key is not just in buying top-tier gear but in fine-tuning each element to work seamlessly together. Remember, even minor mismatches in pressure curves or tilt sensitivity can result in frustration and loss of precision. For those ready to push their setup further, exploring advanced troubleshooting techniques and custom driver tweaks is essential. For a comprehensive breakdown, consult the detailed guides on stylus calibration and high-res display optimization. Finally, don’t fall prey to the belief that newer models are always better; instead, evaluate actual performance and compatibility specifics, as discussed in our review of the best design laptops for artists in 2025.
Have you ever fallen into this trap? Let me know in the comments and share your experiences with high-res stylus support!
Keep Your Setup Sharp With the Right Tools
Maintaining peak performance with your stylus and high-res display requires more than just initial calibration. I rely heavily on specialized equipment like the Wacom Intuos Pro combined with the latest driver updates. This combo provides granular control over pressure sensitivity and tilt detection, which are crucial for nuanced artwork on 16K displays. Additionally, I use a microfiber cloth dedicated to cleaning both my stylus nibs and screen surface daily. Regular cleaning prevents dirt buildup that can cause calibration drift or stylus jitter. Ensuring your software, such as Adobe Illustrator, stays updated with the latest patches minimizes compatibility issues, especially with cutting-edge hardware.
Long-Term Care to Keep Everything Running Smoothly
Over time, even the best calibration can drift due to environmental factors or hardware aging. To address this, I schedule bi-weekly calibration checks using rigorous testing procedures, like drawing grids and comparing offsets. Backups of calibration profiles are a lifesaver—store these profiles externally so you can quickly restore settings after driver updates or system resets. Another tip is to limit exposure to extreme temperatures, which can affect touchscreen sensitivity and stylus responsiveness. Investing in a quality screen protector, like a matte film, helps maintain consistent pen input by reducing surface glare and dust accumulation. Remember, maintaining your equipment isn’t a one-off task; it’s an ongoing process that preserves the investment and ensures your creative flow remains uninterrupted.
Tools I Recommend for Consistent Results
For those serious about precision, I recommend the stylus support tips guide which covers device-specific tweaks like pressure curve adjustments and tilt calibration. Using a calibration tool like Calibrate Your Pen software provides an automated approach to fine-tune your stylus accuracy, saving hours of manual testing. In addition, upgrading to a professional-grade graphics tablet, such as the XP-Pen Artist Pro, can complement your high-res display, especially when working on large-scale projects. This combination allows for smoother strokes, reduced latency, and better calibration retention over time. Remember, integrating high-quality tools tailored to your workflow is key to long-term success.
How Do I Maintain Pen Support Over Time?
Commit to a routine of regular calibration checks, cleaning, and software updates. Restoring calibration profiles periodically and adjusting pressure curves can prevent drift. Also, monitor environmental factors like room temperature and dust levels, as these can subtly impact stylus behavior. For insights on advanced calibration, check out the comprehensive pen input performance guide. Don’t forget to experiment with different nibs—such as titanium or ceramic—to find the one that offers optimal glide and feedback on your specific display surface. Trying out these strategies can greatly prolong the precision and reliability of your pen input system.
Finally, I encourage you to test the hidden stylus settings in your device’s control panel. Tuning these small, often overlooked options can unlock noticeable improvements in pressure sensitivity and tilt detection, especially on high-res nano-glass surfaces. Take the time to implement one or two of these tips today—your drawings will thank you.

What I Wish I Knew About Calibration Before It Was Too Late
One of the most valuable lessons I learned was that even the best stylus and display technology require diligent, ongoing calibration to perform optimally. Relying on a one-time setup is a setup for frustration; consistency demands frequent tweaks, especially after software updates or hardware adjustments. Recognizing this early saved me countless hours and improved my workflow significantly.
Another insight is the importance of understanding how surface coatings, like matte or glossy finishes, can impact stylus responsiveness. It’s not just about hardware specs—environmental factors and the physical surface play crucial roles in achieving true precision.
Finally, I discovered that local calibration corrections, when supported by your device, can rectify persistent offsets in specific areas of your screen. This targeted approach can turn a marginally usable setup into a tool that feels like an extension of your hand, not a frustrating obstacle.
Tools and Resources That Elevate My Creative Journey
For maintaining accuracy and fine-tuning my setup, I rely on the hidden stylus settings guide. It reveals subtle adjustments that can dramatically improve pen pressure and tilt detection, especially on high-res nano-glass screens. Additionally, pressure curve tweaking tools help me customize responses to match my drawing style precisely. Lastly, I champion regular firmware updates from my device manufacturer, ensuring that hardware and software stay harmonized, which is critical for high-resolution work.
Embrace the Challenge and Transform Your Workflow
Every pixel in your high-res display offers an opportunity to refine your craft—if you’re willing to invest the time and patience. Mastering calibration, understanding your hardware nuances, and leveraging specialized tools turn what once seemed like hurdles into the foundation of a flawless digital art experience. Now is the perfect moment to take control and elevate your pen input accuracy; your future projects will thank you for it.
Have you faced specific challenges with stylus calibration or display settings? Share your experiences and solutions in the comments below!