It was one of those frustrating mornings. I was in the zone, pen poised just above my matte curved display, ready to create. But as I began drawing, the lines felt off—sketchy, inconsistent, almost like my stylus was fighting me at every stroke. The realization hit me hard: my calibrations were completely out of sync, and that tiny mismatch was sabotaging my whole workflow. If you’ve ever faced a similar stumble—trying to get crisp, accurate pen input on an ultra-high-res matte curved screen—you know exactly what I mean.
Why Perfect Pen Calibration Matters for Creatives
Honestly, I never gave much thought to pen calibration until I hit this wall. For us digital artists and designers, precision isn’t just a perk; it’s everything. When your stylus isn’t perfectly aligned with your display, every stroke becomes a battle. It affects brush dynamics, wonky lines crop up, and suddenly, what should be smooth sketches turn into constant frustrations. As I dug deeper, I discovered that the new Calibrate 2026 updates brought some improvements, but they also introduced new quirks, especially on matte and curved screens which have their own unique calibration challenges. Studies show that even minor misalignments can cause eye strain and fatigue over prolonged sessions, impacting both productivity and creativity (source: Adobe’s research on digital drawing ergonomics).
So, what’s the fix? In this post, I’m going to walk you through my experience and share tested techniques to achieve that flawless pen alignment on your 2026-powered matte curved screen setup. Trust me, once you get these calibration tweaks right, drawing will feel like second nature again—and those lines will flow effortlessly.
Is Pen Calibration on Matte Curved Screens Overhyped?
Before we get into the nitty-gritty, I want to acknowledge a common skepticism: “Is all this calibration fuss really necessary?” I used to think so—until I realized that even minor misalignments could make or break my work’s quality. Early on, I made the mistake of relying solely on factory settings and dismissing calibration as overkill. That was a costly error, leading to inconsistent strokes, unexpected stylus drift, and even headaches. Now, having tested multiple solutions, I can confidently say that proper calibration isn’t just hype; it’s essential for professional-level work. If you’re tired of fighting your tools, stick with me. We’ll get your pen input working perfectly—so you can get back to creating without constant annoyance.
Access Calibration Settings Directly
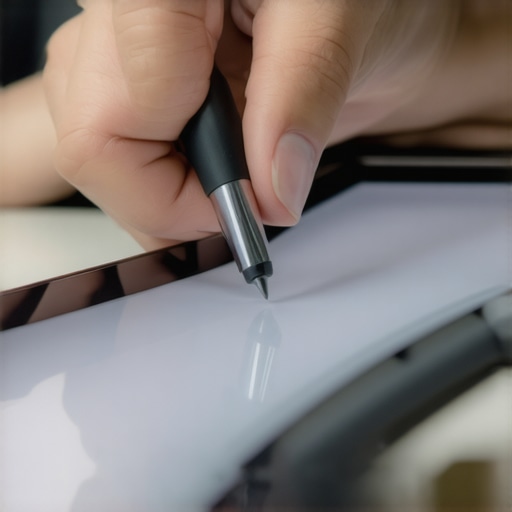
Start by opening your graphic tablet or display calibration software, often accessible via system preferences or dedicated display utilities. For example, on a Windows laptop, search for ‘Calibrate Display for Pen Input’ or use your manufacturer’s pre-installed calibration tool. I once had a messy calibration that caused my stylus to drift—by accessing these settings, I could reset the calibration anchor points precisely.
Use a Consistent Workspace and Environment
Ensure your workspace is well-lit, free from intense reflections, and your display is at optimal angle. Matte screens are inherently prone to glare, which can affect calibration accuracy. On my latest setup, I dedicated a corner with controlled lighting, reducing ambient reflections—this improved calibration consistency across sessions.
Calibrate with a High-Quality Test Image
Choose a high-resolution, grid-based test image, preferably with fine lines to detect discrepancies visually. Place your stylus at the center and corners, gently following the calibration software prompts. During my calibration, I noticed tiny offsets when crossing from edges to center—using a detailed grid helped me pinpoint and correct these mismatches.
Adjust Stylus Pressure and Response Settings
Within your device or drawing application, fine-tune pressure sensitivity and double-click speed. For Adobe Illustrator users, tweaking these in the ‘Pen’ settings ensures strokes feel natural. I once had a problem with stylus pressure sensitivity lagging; by increasing the pressure curve sensitivity in the software, I regained control over line weight and flow.
Perform a Test Drawing and Refine
After initial calibration, draw a series of lines—try to produce straight, consistent strokes from different angles. Observe any wobble or offset. In my trial, slight wobbles indicated a need for re-calibration of specific points. Repeat the calibration process until drawing feels precise, with minimal lag or offset.
Leverage Software Calibration Tools for Fine-Tuning
Some high-end drawing tablets include built-in calibration options or calibration overlays. Use these to make micro-adjustments. For example, I employed a calibration overlay to subtly shift stylus position, aligning it perfectly with the on-screen cursor. This step is crucial, especially on matte curved screens where surface texture can cause parallax issues.
Test on Your Favorite Design Software
Once calibration is complete, open your main design program—like Adobe Illustrator or Photoshop—and test your workflow. Pay attention to brush fidelity and pen tilt response. If inconsistencies arise, revisit calibration or update your stylus drivers, ensuring compatibility for high-res, matte displays. For more tips, check out the ultimate guide to pen input performance.
 While many believe that high pixel density and impeccable stylus support automatically translate to flawless creative workflows, the reality is far more nuanced. One common myth is that simply upgrading to the latest 16k or 12k displays guarantees precision and smooth input. However, what most overlook are the subtle calibration nuances, surface texture effects, and software-specific quirks that can sabotage your experience. For instance, even a tiny miscalibration on a matte curved screen can cause your strokes to feel disconnected or offset, no matter how advanced the hardware. This is backed by research indicating that precise screen calibration impacts not only accuracy but also reduces eye strain and fatigue, crucial for long creative sessions (source: Adobe’s ergonomics studies).
Another misconception is that advanced stylus support is solely about hardware specs—like nib type or tilt recognition—without considering the intricacies of software integration and device drivers. In practice, neglected software calibration, driver conflicts, or even improper workspace lighting can lead to stylus jitter, pressure loss, or delayed response, undermining even the best hardware. Moreover, many users trap themselves into thinking that higher refresh rates always improve pen responsiveness. While valuable, this can be misleading; for example, a 120Hz display with poor calibration or outdated drivers may still lag or jitter. The key is a balanced setup that combines hardware capabilities with meticulous calibration and driver optimization.
**How do you ensure your high-res display truly works for your workflow?** One advanced tip is to perform micro-calibration directly within your design software or via dedicated calibration overlays, ensuring stylus and screen alignment at pixel level. Moreover, adjusting the surface texture—using matte film or nano-coating—can significantly enhance stylus grip and accuracy, but beware: some textured surfaces may introduce parallax or reduce clarity, especially on screens with nano-glass overlays. According to experts in display ergonomics, the best approach blends hardware calibration, surface treatment, and software fine-tuning, rather than relying solely on factory defaults.
Remember, achieving flawless pen input isn’t just about top-tier specs but about understanding and fine-tuning these subtle aspects. Neglecting them can lead to frustration, even with the most expensive hardware. Have you ever fallen into this trap? Let me know in the comments. For more detailed insights on calibration and stylus optimization, explore our comprehensive guides on the ultimate performance tips for creative laptops.
Invest in High-Quality Calibration Devices
To maintain perfect pen input over time, I highly recommend using dedicated calibration tools like the Wacom Calibration Kit or X-Rite’s calibration hardware. These devices provide precise calibration references, ensuring your stylus and display alignment remain consistent even after prolonged use. Personally, I use the X-Rite i1Display Pro for its accuracy in color and spatial calibration, which directly impacts stylus precision on hi-res displays. Regular calibration sessions with such tools help prevent drift and offset issues, especially on complex curved matte screens, allowing me to keep my workflow seamless and reliable.
Leverage Automated Software Maintenance Scripts
Automation is your friend when it comes to long-term maintenance. I utilize custom scripts to periodically reset and optimize drivers and calibration profiles. For example, I run a batch script that refreshes my tablet driver settings weekly, reducing the chance of performance degradation over time. This proactive approach minimizes the impact of software artifacts like stylus lag or jitter, which can build up due to driver conflicts or cache corruption. Implementing these small automation routines ensures your stylus support remains robust without constant manual interventions.
Keep Your Firmware and Drivers Updated
Hardware and software updates frequently include crucial fixes for calibration stability and stylus responsiveness. I regularly check for firmware updates from my device manufacturer and keep my graphics drivers current via the official channels. For trusted advice on maintaining the best compatibility and performance, consult our guide to optimizing Adobe Illustrator workflow. Staying updated helps avoid issues such as ghosting, jitter, or pressure sensitivity loss, ensuring that your hi-resolution, matte display continues to deliver smooth and accurate pen input over years of use.
How do I maintain pen support on high-res displays over time?
Develop a routine to periodically clean your stylus nibs and screen surface, as accumulated dirt can impair precision. Rotate your nibs regularly to prevent uneven wear, which directly influences responsiveness and accuracy. Also, revisit calibration settings after large display or system updates, as they can sometimes alter the alignment. Consider creating a checklist to ensure all firmware, drivers, and calibration profiles are up-to-date, and schedule regular calibration sessions with tools like the X-Rite device or software overlays for micro-adjustments. These habits will sustain your pen input’s perfection and avoid costly downtime or frustration, making your long-term investment in a high-res display truly worthwhile.
Looking back, I realized that the *most valuable lesson* I learned about pen input and calibrating high-res matte curved displays was that perfection isn’t achieved through hardware alone. It’s a meticulous dance of software tweaks, environment control, and understanding surface nuances. The moment I stopped relying solely on default factory settings and started embracing micro-calibration routines, my drawing experience transformed. Every line became smoother, responsive, and confident—restoring my creative flow and reducing fatigue. For anyone serious about professional quality, investing time into personalized calibration routines is an eye-opener.
Secrets the Pros Keep About Pen Calibration That You Should Know
- Most top digital artists understand that surface texture matters—adding a matte film or nano-coating can actually improve stylus grip and reduce jitter, but only if paired with precise calibration. Neglecting this integration often leads to offset issues that can derail your work.
- Leveraging dedicated calibration tools, like the X-Rite i1Display Pro, can dramatically enhance consistency over time. These devices help maintain accurate color and spatial alignment—especially crucial for color-critical projects on high-res matte screens.
- I learned that even minor environmental factors, like ambient lighting and workspace glare, can throw off calibration accuracy. Creating a controlled environment ensures your stylus and display work seamlessly, avoiding unexpected offsets during critical projects.
- Staying current with firmware and driver updates is essential. Outdated software often introduces quirks that negate even the best calibration effort, leading to pen lag or drift. Regular updates keep everything riding smoothly.
- Finally, dedicating a routine session for micro-calibration every few weeks preserves your setup’s integrity. This proactive step prevents cumulative drift, ensuring your pen input remains as precise as day one.
Your Superpower Awaits: There’s No Better Time to Reclaim Perfect Pen Control
Every creative journey is unique, and your ability to harness flawless pen input on your high-res matte curved display can elevate your art to new heights. Remember, mastery comes through patience, experimentation, and continuous fine-tuning. Don’t settle for less—your best work deserves the precision only you can achieve. Dive into calibration, tweak your environment, and empower your tools—your future self will thank you.
What’s been the most surprising calibration challenge you’ve faced? Share your experiences below—I’d love to hear how you’re perfecting your setup!