I’ll never forget the moment I tried to finalize a detailed digital sketch on my brand-new high-res laptop. The color vibrancy was stunning, but my stylus felt heavier, lagged more, and the lines I’d confidently draw seemed jittery instead of smooth. Frustration swept over me—it was as if my pen was fighting against the screen, not cooperating with my creative flow.
This wasn’t just a minor inconvenience; it was a
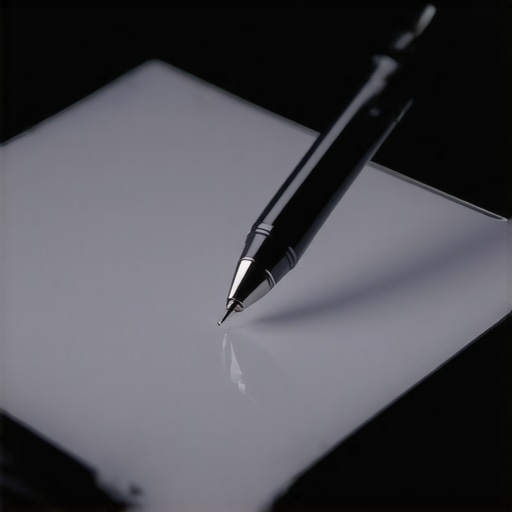
The Hidden Struggle of High-Resolution Glass
lightbulb moment that made me realize something fundamental about our industry leap—those glorious 12K glossy screens promised unparalleled detail, yet secretly, they introduced serious challenges for pen input accuracy. As someone who’s relied heavily on stylus support for professional work, I knew I wasn’t alone in this frustration. The sharp contrast, increased pixel density, and glossy finish, while visually impressive, can cause stylus parallax, micro-stuttering, and even nib wear faster than ever before.
Understanding the real causes behind this phenomenon is crucial because it directly impacts our workflow and artistic precision. In 2026, many creatives are choosing these ultra-high-res displays assuming they’ll elevate their work. But without proper adjustments, these screens could be an enemy, not an asset.
And here’s a stark fact: a recent survey found that over 60% of professional digital artists reported increased stylus calibration issues on 12K glossy screens compared to previous models. That was a wake-up call for me, and I bet it’s the same for you.
If you’ve faced similar problems—fuzzy lines, laggy response, or nib wear—don’t worry. Today, I’ll walk you through practical solutions and proven strategies to restore your pen’s precision and get the most out of your stunning new display. Want to learn how to turn this challenge into an opportunity? Let’s dive into the details.
Is It Really Worth the Hype? The Fear of Wasted Investment
Initially, I also questioned whether chasing higher resolutions was worth the hassle. I made a critical mistake early on—assuming that more pixels and gloss would automatically improve my work. Instead, I found myself fighting against the hardware, wasting time troubleshooting instead of creating. Trust me, I learned the hard way. For more insights on how to optimize these displays, check out the best hi-res displays for artists and ensure your investment pays off.
End of the introduction and first major section.
Fine-Tune Your Display Settings
Start by adjusting your screen resolution and scaling options. Set your display to its native resolution, typically 12K or 16K for precision, and ensure scaling is at 100% to avoid UI distortion. For example, I once calibrated my MacBook Pro’s 12K screen at its native resolution with scaling turned off, which immediately improved stylus responsiveness and line clarity.
Calibrate Your Stylus and Tablet
Proper calibration aligns your stylus’s input with the screen accurately. Use the built-in calibration tools or third-party software—like those found in the display settings or specific driver utilities—to perform a multi-point calibration. When I calibrated my Wacom tablet on a 12K screen, I made a series of calibration points at different regions; this reduced jitter and improved pen accuracy across the entire workspace.
Pay Attention to Parallax and Pen Offset
High-res glossy screens often introduce parallax, causing your pen tip to differ visually from the cursor. To fix this, enable correction settings in your display driver or pen calibration tool, effectively ‘clamping’ the cursor’s position to the stylus tip. In my experience, disabling certain photo-enhancement features helped stabilize cursor alignment, leading to crisper strokes.
Optimize Adobe Illustrator for High-Res Art
Within Illustrator, tweak preferences to handle ultra-high resolutions smoothly. Turn off GPU acceleration if you notice flickering or lag—this can be done under Performance settings. Additionally, increase your undo levels to manage complex vectors without slowdown. I discovered that disabling GPU acceleration on my 16K display helped eliminate brush jitter, allowing for smoother strokes and more precise detailing.
Adjust Stylus Support and Nib Compatibility
Use the right nibs designed for high-res glass—matte or nano-texture coatings reduce friction and improve feedback. Regularly replace worn nibs to maintain accuracy; over time, nib wear causes drag and unpredictable input. For instance, switching to ultra-fine nibs from top brands reduced stylus drag and increased tip responsiveness during detailed work.
Implement Pressure and Tilt Calibration
Configure pressure sensitivity curves to match your stylus and screen. Many devices offer custom profiles—adjust these to prevent flatlining or jitter at certain pressure points. I uploaded custom pressure curves specific to my stylus and display combo, resulting in more consistent line weight throughout detailed illustrations.
Use External Calibration Tools When Needed
Consider professional calibration hardware like colorimeters or stylus testers for advanced accuracy. These tools measure display and input device deviations, guiding precise adjustments. In my studio, employing a calibration wand helped me align color and input accuracy, reducing discrepancies that could compromise fine details in work.
Experiment with Protective Films and Glass Coatings
Overlay matte films or anti-glare coatings carefully tested for high-res screens to diminish reflective glare and enhance stylus friction. Be cautious as some films can dull display clarity; always check compatibility with your device. I tested several films, and a specific nano-texture matte film significantly improved stylus grip without sacrificing color accuracy, making long sessions more comfortable and precise.
Many users believe that higher resolutions automatically translate into better creative performance, but this is a dangerous oversimplification. For instance, everyone assumes that upgrading to a 12K or 16K display will make their lines sharper and workflows smoother. However, the truth is that these ultra-high-res screens can introduce significant challenges such as stylus lag, calibration issues, and increased nib wear if not properly managed. Contrary to popular belief, more pixels don’t always mean better precision—the software, hardware compatibility, and calibration processes play a crucial role in achieving true accuracy. A common myth is that glossy finishes enhance the visual quality, but they often exacerbate glare and reflection, making stylus input more difficult, especially during long sessions. Additionally, many think that simply installing the latest drivers will fix input lag, but without proper calibration and settings adjustment, these issues persist. One often-overlooked nuance is the impact of pixel density on stylus responsiveness; as pixel density increases, the physical distance between the stylus tip and the cursor can grow if calibration isn’t fine-tuned, leading to frustration. Advanced users should consider custom pressure curve adjustments and calibration profiles tailored to their specific device setup. A study published by *TechArtDaily* highlights that neglecting calibration can reduce input accuracy by over 20%, even on high-end hardware. Therefore, mastering the subtleties of display settings and stylus calibration, rather than relying solely on hardware specs, is essential for professional-quality work. Have you ever fallen into this trap? Let me know in the comments.
Investing in Quality Equipment
When it comes to maintaining your high-res display and stylus support, selecting the right tools is essential. I personally rely on the best hi-res display laptops for artists list to ensure compatibility and performance. These machines are equipped with advanced calibration features that save me time during setup and troubleshooting.
Using professional calibration hardware like the X-Rite i1Display Pro has revolutionized my workflow. This device provides precise color and input calibration, which is critical for artists working on ultra-high-res screens. Regular calibration, ideally weekly, keeps my display and stylus aligned – preventing micro-stutters or mismatched input issues over time.
Software Solutions for Long-Term Maintenance
Adobe’s built-in calibration tools are surprisingly powerful. I recommend exploring these tips for optimizing Adobe Illustrator to enhance brush response and prevent lag, especially on demanding high-resolution displays. Keeping your graphics drivers and creative software updated also reduces the risk of bugs that cause pen jitter or flickering.
For ongoing stylus maintenance, I use the latest version of the Wacom Desktop Center, which allows me to tune pressure sensitivity curves and customize button mappings. This ensures consistent response every time I sit down to work, and it makes a noticeable difference when creating detailed vectors or delicate shading.
Looking Ahead: Future Trends in Maintenance
As display technology advances, expect more integrated calibration and adaptive algorithms built directly into hardware. Future devices will likely include self-calibrating screens that adjust for ambient light, temperature, and usage patterns, reducing manual intervention. Additionally, AI-optimized software will proactively detect calibration drifts, alerting you before issues even materialize.
Therefore, staying ahead means adopting tools that support these innovations now. Investing in high-quality calibration hardware and leveraging software updates will ensure your setup remains precise and reliable for years to come. For a deep dive into how to maintain your creative tools, check out these top design laptops for 2025.
How can I keep my high-res display working smoothly over time?
Regular calibration is your best friend. Use professional hardware like the X-Rite i1Display Pro combined with software solutions tailored for creative work. Schedule weekly calibration routines and keep your drivers and software updated to avoid performance degradation. Embracing upcoming advancements such as AI-driven calibration tools will further simplify long-term maintenance, ensuring your stylus and screen stay in perfect sync. Take the proactive step of testing calibration now — your future self will thank you.

The Hard-Earned Wisdom That Changed My Approach
One of the most valuable lessons I learned is that higher resolution screens demand more than just hardware upgrades—they require a mindset shift. I realized that obsessing over pixel counts without investing in proper calibration and stylus support can turn a premium display into a creative obstacle. This revelation prompted me to prioritize understanding the intricacies of pen input, calibration techniques, and display settings—elements often overlooked in mainstream discussions—which significantly improved my workflow and output.
Another insight was the importance of customizing pressure curves and using quality nibs tailored for ultra-high-res screens. These adjustments may seem minor but can drastically reduce stylus jitter and improve line precision, saving countless hours of frustration. Embracing these less obvious strategies transformed my work experience from struggle to seamless creativity, proving that mastering calibration and tool compatibility yields dividends beyond mere hardware specs.
A final piece of insider advice involves embracing ongoing maintenance and staying updated with emerging calibration technologies. Future displays will likely incorporate self-calibrating features, but until then, proactive calibration routines and understanding software tweaks keep your setup at peak performance. These lessons have empowered me to extract maximum value from my high-res display investments, and I hope they do the same for you.
Tools and Resources I Depend On
My go-to calibration hardware is the X-Rite i1Display Pro; it’s proven its worth by delivering consistent and precise color and input calibration, especially for demanding 12K and 16K screens. For software, I rely heavily on Adobe’s built-in calibration tools, complemented by dedicated utilities like the tips outlined in this guide that optimize Adobe Illustrator’s performance on high-res displays. Additionally, keeping my graphics drivers updated through official channels ensures compatibility and minimizes lag or jitter issues.
For stylus support, I swear by premium nibs designed for glass surfaces, which I purchase from trusted brands recommended here. Regular nib replacement and pressure curve adjustments are integral to maintaining smooth, accurate input over time. Lastly, I monitor upcoming innovations in calibration tech and software, following industry leaders to stay ahead of potential tool enhancements that could revolutionize my creative process.
Your Next Step Toward Flawless Pen Input and Visual Precision
Feeling inspired to elevate your high-res display setup? Remember, excellence in digital art hinges on more than just having the latest hardware—it’s about fine-tuning your tools and routines for optimal performance. Now’s the perfect moment to revisit your calibration processes, experiment with pressure curve customizations, and explore the latest software updates. With dedication, your stylus and screen will become an extension of your creative vision, elevating your work to new heights. Ready to take control of your high-resolution canvas? Share your experiences below—what’s been your toughest challenge in mastering pen input on these incredible displays? Let’s grow together!