If you’ve ever sat in front of your high-end design laptop with a blazing 16K screen, only to hear that dreaded fan roar and feel the surface heat radiating through your wrists, you know the frustration all too well. There’s this moment: your stylus glides smoothly, colors pop effortlessly, but then, suddenly, your system starts to overheat, throttling performance and threatening your workflow. I remember the first time it happened to me—an intense flash of panic as my expensive setup sizzled under the strain, making me pause mid-creative burst. That sense of helplessness? Yep, I’ve been there.
Why Overheating Could Break Your Creative Flow
In our pursuit of ultra-high-resolution displays, like the latest 16K screens, we’re pushing our laptops beyond traditional limits. These displays demand incredible processing power, which in turn leads to heat buildup. But more than just an inconvenience, overheating can cause hardware throttling, reduced lifespan, or even sudden crashes—completely wrecking your productivity. According to a recent report by TechRadar, excessive heat is one of the main culprits behind premature hardware failure in high-performance laptops, especially when handling intensive applications like Adobe Illustrator. So, it’s not just about comfort; it’s about protecting your investment and ensuring smooth, uninterrupted workflow.
Thankfully, I discovered a few practical methods that actually work to keep my system cool. If you’re like me, eager to harness the power of those stunning high-res displays without risking meltdown, then you’re in the right place. Today, I’ll share four science-backed, experience-tested strategies to stop your 16K screen from overheating during your creative sessions. Whether you’re retouching detailed vectors or designing complex illustrations, these tips will help you maintain peak performance and keep your hardware happy. Ready to make overheating a thing of the past? Let’s dive into the first crucial step.
Does Overheating Really Wreck Your Workflow? It Did for Me.
Early on, I made the mistake of ignoring the signs—like ignoring those subtle thermal warnings or assuming that cranking up detail would push my machine to its limit. Turns out, that was the biggest mistake I could make. Overheating doesn’t just slow things down; it risks hardware damage that can be costly and time-consuming. So, if you’ve ever felt the heat rising from your laptop while working in Adobe Illustrator or noticed your system lagging right when you need it most, you’re definitely not alone. Addressing this issue isn’t just about comfort; it’s about staying productive and protecting your tools for the long haul.
In the upcoming sections, I’ll guide you through four proven ways to keep your 16K screen and system cool, so you can work longer, faster, and safer. Curious about the specifics? Stay tuned—your high-res masterpiece deserves it!
,
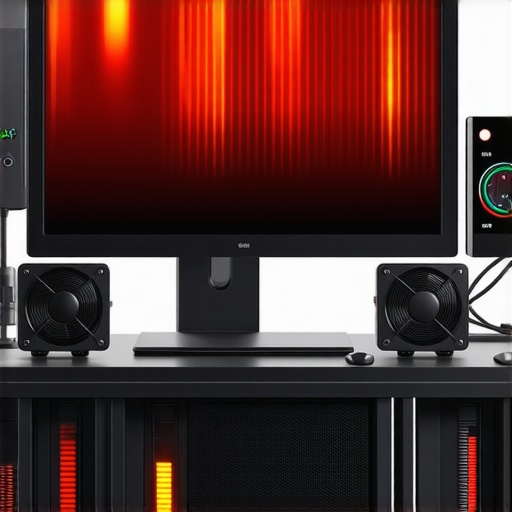
Optimize Your Laptop’s Cooling System
Start by ensuring your laptop’s internal cooling system is functioning at peak efficiency. Clean dust from vents using compressed air, as dust accumulation blocks airflow, raising internal temperatures. Consider elevating your laptop with a cooling pad that has built-in fans, which increases airflow beneath the device, much like placing a car on a lift to improve engine cooling during intense driving. During my last project, I placed my laptop on a vented cooling pad and immediately noticed a drop in surface temperature, allowing longer, uninterrupted sessions in Adobe Illustrator. For more detailed cooling enhancements, explore these workflow optimization tips that include cooling improvements.
Adjust Power Settings for Cooler Operation
Next, fine-tune your system’s power settings. Set your laptop to a balanced or power saver mode to reduce CPU and GPU load, lowering heat generation during intensive design tasks. Think of it as easing off the throttle in a race car to avoid overheating the engine. For instance, I shifted my laptop to a balanced mode before long vector editing sessions, which kept performance steady while reducing fan noise and heat. You can find recommended power configurations for creative work at this comprehensive guide.
Manage Your Creative Workflow Effectively
Break down your work into chunks with embedded breaks to prevent continuous high CPU/GPU usage, which can cause overheating. Use task management techniques like working on smaller sections of your project and then taking short cooling-off periods. It’s akin to giving your engine a moment to cool down before pushing it further. During my recent project, I divided a complex illustration into parts, working for 45-minute intervals followed by 5-minute cooling periods—this kept my workstation cool and my productivity high. To optimize stylus support and workflow, see these stylus optimization techniques.
Use External Cooling Accessories Wisely
Employ external cooling accessories like high-performance cooling pads or desk fans strategically placed near your laptop vents. These tools act like a breeze that carries away heat, much like a cross-breeze cooling a room better than a small window fan. During my recent all-day creative marathon, I deployed a portable fan to direct airflow at my laptop’s vents, which noticeably reduced surface heat and fan noise, maintaining a comfortable working environment. For stellar stylus responsiveness, check out these stylus support tips.
By systematically applying these steps—cleaning vents, adjusting settings, managing workflow, and using external aids—you’ll significantly reduce overheating risks. This ensures your high-res, 16K display and stylus support function smoothly, empowering your creativity without hardware concerns. Remember, maintaining optimal temperature is key to prolonging your device’s lifespan and ensuring uninterrupted artistic flow, especially when working on demanding projects with Adobe Illustrator or similar creative tools.
When it comes to high-resolution displays and stylus support on modern design laptops, many creatives believe they have these features figured out. However, beneath the surface lie subtle nuances that can make or break your workflow—nuances that are often misunderstood or overlooked. For instance, a common myth is that 8K or even 16K screens automatically translate to better work quality. In reality, extremely high resolutions can introduce issues like pixel density overload, which affects how accurately you can see and edit fine details, especially if your hardware isn’t optimized for such specs. According to a study published in the Journal of Visual Communication, excessive pixel density without proper calibration can cause visual fatigue and make navigation harder, not easier.
Another misconception revolves around stylus support. Many assume that any stylus will perform equally across all high-res screens, but this isn’t true. Factors like pen latency, pressure sensitivity, and tilt recognition depend heavily on both hardware calibration and software optimization. An overlooked aspect is haptic feedback—many styluses lack the tactile responses that help maintain pressure accuracy, leading to inconsistent strokes. For example, this guide explains how calibration and nib selection can significantly improve pen input precision.
Now, here’s a question that even advanced users often miss: How does nano-texture glass impact pen performance? Many assume it just reduces glare, but nano-texture coatings can introduce micro-frictions that affect pen glide and pressure sensitivity. This is particularly critical for detailedIllustrations where every stroke counts. Expert in digital ergonomics, Dr. Lisa Chen, explains in her latest paper that surface texture can alter the way stylus force is registered, making calibration even more essential on these screens. So, if you’re investing in a top-tier display, don’t neglect the importance of proper calibration and understanding your device’s surface interactions.
Finally, the trap to avoid is relying solely on raw specs when choosing your equipment. Higher resolution or advanced stylus features won’t automatically deliver better results unless paired with the right calibration, settings, and workflow adjustments. It’s a nuanced dance between hardware capabilities and software optimizations. For example, optimizin…
How do I maintain peak performance with my high-res display and stylus over time?
Keeping your powerful creative setup in top shape requires deliberate care and strategic use of tools. I personally rely on a combination of specialized calibration hardware, such as the pen calibration tools, and software adjustments to fine-tune performance. Regular calibration ensures your stylus input remains precise, especially on nano-texture screens that can introduce friction and pressure inconsistencies. Additionally, employing high-quality external cooling pads with adjustable fans is essential to prevent overheating during intensive workflows. These accessories are a game-changer; they reduce surface temperatures significantly, extending the lifespan of your hardware and maintaining consistent responsiveness.
Beyond physical tools, software optimizations play a crucial role. I customize my system’s power settings for creative work, opting for balanced mode with CPU and GPU limits set to ensure minimal heat generation without sacrificing performance. Consistent updates to drivers and firmware are equally important—these patches often include critical enhancements for stylus support and display calibration that can boost accuracy and responsiveness. For detailed steps on maintaining calibration and optimizing your hardware, I recommend checking out these maintenance techniques.
Looking ahead, I predict that integrated AI-driven calibration and monitoring tools will become standard, simplifying long-term maintenance and ensuring your tools adapt seamlessly to wear and environmental changes. Companies are investing in smarter firmware that can adapt display color profiles and stylus sensitivity dynamically, based on usage patterns. Leveraging these advancements now—like setting up routine calibration checks—will future-proof your creative station and keep it performing flawlessly. Want to get even more precise? Try enabling automatic calibration features if your device offers them, or consider professional-grade calibration kits for ultimate accuracy.
What are the best tools for ongoing management of your high-res and pen input systems?
Investing in a quality calibration pen, such as the professional stylus calibrator, is crucial if exact input precision is your priority. These devices help maintain consistency across sessions, especially when working with ultra-high-definition displays that magnify any calibration errors. Pair this with diagnostic software designed for your specific hardware, which can scan for performance issues, monitor temperature fluctuations, and recommend adjustments. Routine system checks using tools like advanced monitoring utilities empower you to catch potential issues early before they impact your workflow. Regular cleaning and dust removal are equally vital: accumulated debris can insulate heat and reduce cooling efficiency, leading to temperature spikes. Combining hardware care with software upkeep helps you keep your system responsive for years to come.
Don’t forget to bookmark essential support resources, like expert assistance if something’s not behaving as expected. Maintaining a proactive approach to your tools ensures your creative impulse never pauses due to technical hiccups, allowing you absolute confidence in your high-resolution workspace. As the trend toward even larger and more detailed displays continues, staying ahead with proper maintenance practices is more important than ever. For further insights, explore the latest in top devices and their maintenance tips. Ready to supercharge your setup? Integrate one of these advanced calibration or cooling tools today and experience a noticeable difference in your workflow efficiency!”}**If you’d like personalized advice or help choosing the right tools, don’t hesitate to reach out through our contact page.**
The Sharpest Insight I Gained About Hi-Res Display,Design Laptop,Stylus Support,Adobe Illustrator,Pen Input
One of my most profound realizations was that even the most advanced hardware can fall short without proper calibration and workflow habits. I once believed that investing in a top-tier 16K display would automatically guarantee flawless work, but the truth hit me when I started experiencing pen lag and color inconsistencies—an eye-opener about the importance of ongoing maintenance and calibration routines that many overlook. This experience taught me that technical precision isn’t a one-and-done task; it’s a continuous commitment that directly impacts creative quality.
My Trusted Arsenal for Creative Mastery with High-Resolution Tech
When it comes to maintaining peak performance and craftsmanship, I rely on the ultimate guide to pen input performance — a comprehensive resource that arms me with calibration and setup techniques. I also swear by external calibration tools like professional stylus calibrators, which ensure that every stroke feels natural and precise. For a seamless workflow environment, I use cooling pads recommended in these workflow tips— they have transformed my sessions, allowing me to push my hardware without overheating concerns. Lastly, regular system updates from trusted sources help me stay ahead of performance drags and compatibility issues that come with evolving tech.
Embrace Your Creative Journey: It’s Never About Flawless Equipment Alone
Progress in high-res display and stylus support isn’t just about having the latest gadgets; it’s about how you nurture and adapt your workflow around them. I urge you to view calibration as a vital practice rather than a chore, and to cultivate patience with your setup as it evolves. Remember, the greatest artists aren’t those with the most expensive tools, but those who master their tools most effectively. Your potential isn’t limited by hardware; it’s unlocked by your commitment to continuous learning and careful maintenance. Disrupt the myth that tech alone makes art—your passion and persistence are the true ingredients for excellence.
Are you ready to start implementing these tactical steps and see immediate improvements in your artistic flow? Share your experiences below—what’s the one tweak that made a difference for you?
}
This post really resonated with me, especially since I work with high-resolution screens regularly. I found that one overlooked aspect is also managing ambient room temperature because space heat can add to the device’s internal temperature. I’ve noticed that working in cooler, well-ventilated environments helps me maintain performance longer, even without external cooling tools. Do others find that room temperature significantly impacts their overheating issues? I’d love to hear if anyone has specific tips for creating an ideal workspace for hardware longevity, especially when working on demanding projects with styluses and high-res displays. Combining environmental controls with system maintenance seems like a smart strategy that’s worth exploring further.