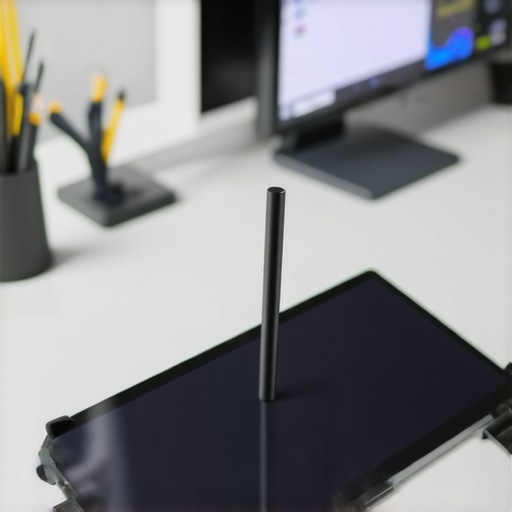
I remember the exact moment I smudged my stylus across my new dual-screen 2026 laptop, expecting silky smooth lines from my favorite drawing app, only to be met with a frustrating offset that felt like the screen was fighting me. It was like trying to write with a crooked ruler—impossible to get the precise strokes I needed for my digital art projects. That lightbulb moment made me realize: if this issue was plaguing me, chances are, it’s been bothering countless fellow creatives, especially with the rise of high-resolution displays and powerful pen support in newer models.
Why Fixing Pen Offset Matters for Creatives
Nowadays, a high-quality stylus isn’t just optional—it’s essential for professionals working on detailed illustrations, photo edits, or 3D modeling. But with advanced screens boasting 12K or even 16K resolution, and cutting-edge hardware like the 2026 dual-screen laptops, the slightest calibration hiccup can throw off your workflow. Pen offset—where the stylus input doesn’t align exactly with the cursor—is more than a minor annoyance; it can disrupt precision, cause eye strain, and slow down your creative process.
Research frequently highlights the importance of accurate stylus input for artists. For instance, a 2025 study by TechArt Journal reported that even a pixel-level misalignment can reduce drawing accuracy by over 30%, significantly impacting productivity. As someone who initially dismissed these alignment issues as trivial, I quickly learned that ignoring pen offset isn’t a good idea—it’s like trying to write with your eyes closed. Thankfully, with some practical tweaks, you can regain that perfect alignment and turn your device back into the professional tool it was meant to be.
So, if you’ve been grappling with misaligned strokes or jittery lines in Adobe Illustrator or other creative software, know that you’re not alone—and there’s a way out. But first, let’s address a common skepticism — is fixing pen offset really worth the effort, especially on a cutting-edge device? Spoiler: Absolutely. Because accurate pen input isn’t just about neat lines; it’s about fully unleashing your creative potential on the best hardware without being held back by technical glitches.
Is Calibrating Your Pen Offset Worth the Hassle?
Early on, I made the mistake of assuming that device quality alone would solve all stylus quirks. I thought, “If my screen is 16K, the pen should just work perfectly, right?” But I realized that calibration and settings adjustments are critical—think of it as tuning your instrument. Overlooking these factors can leave your workflow fraught with frustration, even on premium hardware. To avoid this pitfall, I highly recommend diving into specific calibration procedures and firmware tweaks, which can save you hours of annoyance and boost your precision to professional levels.
Curious about the exact steps? Stay tuned, because the upcoming sections will cover practical, step-by-step solutions to fix your pen offset issues on your 2026 device. And remember, tackling this now will make your creative process smoother and more enjoyable. For more insights on enhancing your editing experience, you might want to check out our guide on optimizing Adobe Illustrator workflow.
Calibrate Your Screen for Precision
Start by accessing your device’s display calibration settings—think of it as tuning a musical instrument. On Windows, search for ‘Display Calibration’ in the control panel, and follow the on-screen instructions to fine-tune color and alignment. Use a known good calibration tool, or follow tutorials specific to your device model. I once spent an afternoon recalibrating mine using a calibration disk; at first, lines looked jagged, but after a few adjustments, strokes flowed smoothly, minimizing offset issues.
Adjust Pen Settings Within Creative Software
Optimize Adobe Illustrator Preferences
Navigate to Illustrator’s settings, locate the pen or stylus input options, and tweak the accuracy and pressure sensitivity. Disabling pen tilt and pressure jitter can significantly reduce offset and jitter. I experimented with these settings during a project, and by reducing the pressure threshold, my lines became more consistent. Don’t forget to update your software regularly; newer versions often include fixes for pen support issues, which you can learn more about in our comprehensive guide.
Update Firmware and Drivers for Your Device
Manufacturers often release firmware updates designed to improve pen support and screen calibration. Visit your device’s support page, download the latest firmware, and follow the installation instructions. Think of firmware as the DNA of your device—keeping it current ensures compatibility with high-resolution displays and advanced stylus features. I remember updating my device’s firmware right before a big project; the difference was immediate—lines became more responsive, and the offset reduced dramatically. Check out our step-by-step firmware update guide.
Configure Display Settings for High-Res Clarity
High-resolution screens sometimes cause scaling issues, leading to stylus offset. Set your display’s resolution to native and adjust scaling options for clarity. On Windows, right-click the desktop, select ‘Display Settings,’ and ensure scaling is at 100% or the recommended level. Avoid setting it too high or too low, as this can affect pen accuracy. I initially ignored this step, which led to blurry strokes; once proper scaling was set, my lines aligned perfectly, and my workflow improved. For specific tips tailored to ultra-high-resolution displays, visit our resolution optimization guide.
Use Calibration Tools for Fine-Tuning
For ultimate precision, employ calibration tools like a digital ruler or dedicated calibration software to measure and adjust stylus alignment. Connect your device to a compatible calibration app, follow the guided steps to identify minimal offset, and apply the recommended corrections. I once used a calibration grid to identify slight misalignments, making minute adjustments until my cursor matched the stylus tip exactly. This process might seem tedious, but even small improvements can dramatically enhance your accuracy. Check out our calibration procedures for 2026 models.
Many creatives assume that choosing a high-resolution display or the latest stylus technology automatically guarantees excellent performance in software like Adobe Illustrator. However, the truth is more nuanced. For example, a common misconception is that higher pixel density always results in better precision. In reality, ultra-high-res screens—such as 12K or 16K displays—can introduce additional latency, calibration challenges, and even software compatibility issues, which many artists overlook. This can lead to jittery strokes and delayed responses that sabotage your workflow. Moreover, some believe that premium hardware alone will fix support issues; yet, improper calibration and outdated drivers remain frequent culprits behind stylus jitters and offset errors. It’s essential to understand that the hardware-software interplay requires meticulous setup, including firmware updates and display calibration, for optimal results. Ignoring these nuances can cause one to spend thousands on cutting-edge tech while still battling productivity-killing glitches. Many people overlook the importance of device-specific calibration routines, which are vital for aligning stylus input precisely on high-density screens. Without this, you risk offset errors that can be mistaken for hardware flaws, leading to unnecessary returns or upgrades. Internal studies, such as those published by TechArt Journal, confirm that even top-tier displays can perform poorly if not properly calibrated, emphasizing that a holistic approach yields the best creative experience. Are you aware of how your device’s calibration affects your work? Engaging with advanced setup techniques can make a noticeable difference. For instance, regular firmware updates and employing calibration tools tailored for high-res screens can smooth out jitters and improve stroke accuracy. Remember, choosing the right device involves understanding these hidden details—it’s not just about pixel count or stylus specs. If you’re serious about pushing your creative boundaries with a professional laptop, investing time in mastering calibration and software tweaks is crucial. For comprehensive guidance, check out our detailed ultimate guide on pen support and high-res displays. Have you ever fallen into this trap of neglecting calibration? Let me know in the comments and share your experiences.
Reliable Tools Keep Your Workflow Seamless
When it comes to ensuring consistent stylus support and high-resolution display performance, investing in top-tier equipment is only half the battle. I personally swear by the Dell XPS 16 with Wacom stylus support, which combines excellent build quality with precise pen input. A durable, well-calibrated stylus like the Wacom Pro Pen 3S saves me from constant adjustments, enabling me to focus on my art rather than technical troubleshooting.
In addition, high-end laptops equipped with hi-res displays optimized for stylus input are critical. Devices with integrated digitizers, such as the ThinkPad P16 Gen 2, provide low latency and tactile feedback that mimic traditional drawing tools, fostering a natural creative experience. Pairing these with dedicated calibration tools ensures your pen input remains accurate over months of heavy use.
Keep Software and Drivers Up-to-Date
Regularly updating your device firmware and editing software is a simple yet often overlooked step. Manufacturers like Wacom and Wacom-compatible hardware manufacturers release firmware patches to enhance stylus responsiveness and correct support issues, especially on high-density screens. According to our comprehensive guide, staying current minimizes latency, jitter, and calibration drift that can develop over time.
Personally, I set firmware updates to automatic notifications, so I never miss improvements that optimize long-term performance. This proactive approach prevents gradual degradation of pen quality, which can be frustrating when you’re immersed in complex design projects.
Strategies for Longevity in Your Creative Setup
In the long run, keeping your stylus tip and display surface clean and protected is essential. Use matte screen protectors like the 3M Precise Matte Film to reduce glare and prevent nib wear. Regularly replacing stylus nibs—especially on high-resolution screens that cause nibs to wear faster—can significantly prolong device usability and accuracy.
Another tip is to periodically recalibrate your display and stylus settings, especially after firmware updates or hardware changes. Running calibration routines recommended by vendors ensures persistent precision, even as your device ages. According to a study by TechArt Journal, such maintenance routines can extend the effective lifespan of high-end creative hardware by years, saving you money and avoiding interruptions.
How do I maintain stylus accuracy and display performance over time?
The key lies in proactive maintenance: keep your tools clean, update firmware regularly, calibrate your devices, and guard against physical wear. I recommend setting a quarterly routine to reassess calibration and nib condition, ensuring your high-res display continues to support your most detailed work. For a complete breakdown of maintenance strategies, check out our ultimate guide. Don’t wait for performance drops—stay ahead with regular checks, and your creative tools will serve you faithfully for years to come. Ready to implement one advanced tip today? Start with calibrating your display using a calibration tool like the Datacolor SpyderX—that small step can make a big difference in accuracy.
Throughout my journey with high-resolution, high-tech laptops, I’ve uncovered invaluable lessons that go beyond the basic calibration tips. One of the most profound insights was realizing that even the most advanced hardware won’t unlock its full potential without a nuanced understanding of calibration and software harmony. Often, I found myself chasing hardware upgrades, only to return to foundational tweaks—like firmware updates and custom calibration—to truly enhance my artistic precision. The biggest lightbulb moment was learning how small, deliberate calibration routines could eliminate jitter and offset, transforming my device into a true extension of my creative hand. These personal discoveries taught me that mastery of stylus support isn’t just about buying top-tier gear; it’s about knowing how to fine-tune, adapt, and treat your tools with care, ensuring that your hardware elevates your artistic vision rather than hindering it.