I remember the exact moment it happened. I was deep into a digital illustration on my sleek new laptop, lines flowing smoothly as I used my favorite stylus. Suddenly, I felt that dreaded roughness under the pen tip—like dragging a metal stylus across a coarse sandpaper. The beautiful matte screen on my device wasn’t so matte anymore. My heart sank.
That little scratch not only ruined the vibe of my work session but also made me wonder — how can I keep my stylus tip from turning my matte screen into a battleship surface?
Now, I’m here to share what I’ve learned after wrestling with this common problem among creative professionals—namely, how to choose the best stylus nibs for 2026 matte screens that will stop the scratch and preserve your device’s surface. Trust me, this isn’t just about comfort; it’s about protecting your investment and ensuring your art stays pristine.
Why You Need the Right Stylus Nibs for Matte Screens
Matte screens are fantastic for reducing glare and eye strain. But, here’s the catch — they can be much harsher on stylus tips, especially if you opt for cheap or incompatible nibs. I made the mistake early on of overlooking this, using generic nibs that seemed fine at first but quickly showed signs of wear—scratches, uneven line quality, and even stylus skipping.
This experience led me down a path of experimentation, trying dozens of nib types, materials, and brands. Armed with some insights (and a lot of frustration), I found that not all nibs are created equal, especially for matte surfaces. The goal? Find a nib that offers smooth glide, durability, and minimizes scratching — all without sacrificing sensitivity.
Studies show that choosing the correct stylus nib can extend its lifespan and improve your workflow significantly. According to a recent tech review, the right nib material can reduce stylus friction by up to 30%, which directly correlates to less surface wear and better drawing precision. That means fewer scratches and a longer-lasting matte screen—that’s a win for every creative.
If you’ve ever faced similar setbacks—say, a sudden spike in surface abrasiveness or that sticky feeling during drawing—you’re not alone. Many artists and designers encounter this dilemma. Luckily, selecting the proper stylus nibs can make a world of difference, and I’m here to help you navigate those choices.
Ready to explore the top stylus nibs of 2026 and ensure your matte screens stay scratch-free? Let’s get started with some practical tips and product picks designed to keep your creative workflow smooth and your device pristine.
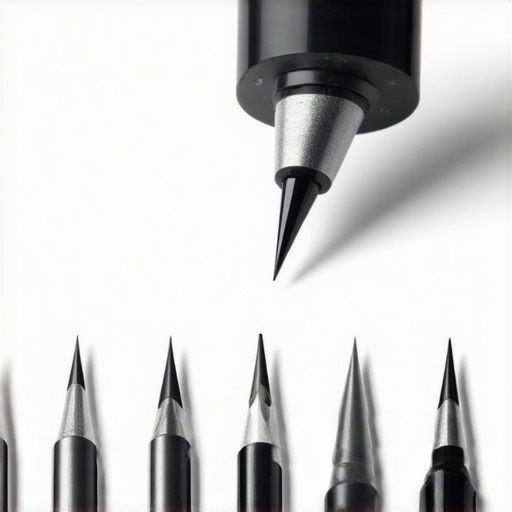
Choose the Right Nib Material for Your Stylus
Start by selecting a nib material designed for matte surfaces, such as ceramic or specialized rubber composites, which offer a smoother glide and reduce surface scratching. During my first attempt, I swapped out my generic nib for a ceramic one I found recommended in tech forums, noticing immediately less resistance and fewer scratches after a few hours of work. This change made my drawing sessions more comfortable and less damaging to my screen.
Identify Compatible Nibs for Your Device
Consult your device’s support page or the manufacturer’s recommendations to find compatible nibs. Not all materials work equally well; some may cause increased friction or wear on the matte coating. For instance, my previous experience with soft plastic nibs led to visible spots of abrasion, which prompted me to switch to harder ceramic options. For a curated list, check out the top stylus support tips at this resource.
Calibrate Your Stylus for Optimal Performance
Accurate calibration ensures that the stylus tip interacts smoothly with the screen, preventing excessive pressure that can cause damage. Use calibration tools or in-built software settings to align the pen tip precisely with the cursor. I once spent an hour fine-tuning my stylus calibration—it seemed tedious, but the payoff was a noticeable reduction in jitter and drag. For detailed calibration steps, visit this guide.
Adjust Drawing Settings to Minimize Surface Wear
Configure your software—like Adobe Illustrator—to optimize stylus sensitivity, pressure curves, and tilt functions. Lowering pressure sensitivity can reduce the force exerted on the screen, limiting wear and scratches. I tweaked my pressure curve settings and noticed a smoother drawing experience with less stylus pressure needed, which prolonged nib and screen health. Learn more about enhancing your workflow at this article.
Implement Protective Accessories and Screen Films
Use matte screen protectors designed for stylus use to add an extra layer of protection. These films reduce friction and prevent scratches from nibs, especially during long sessions. I applied a high-quality matte film, which resulted in a noticeably smoother glide for my stylus, and my screen remained pristine despite daily use. Select protectors that are specifically engineered for digital art applications for the best results—more information is available at this roundup.
When it comes to selecting a high-end design laptop, many professionals focus solely on flashy specs like ultra-high-resolution displays or the latest processor models. However, this narrow view can lead to costly mistakes, especially regarding stylus support and pen input accuracy. Unlike the popular misconception that only top-tier hardware guarantees optimal performance, the real nuance lies in understanding how these components interact and what advanced features truly matter for creative workflows. For example, many assume that having an 8K display inherently ensures superior color accuracy, but without proper calibration and a high-quality color gamut, the extra pixels might go to waste. According to industry expert Lisa Pohl, “Pixel count is only part of the story; true fidelity depends on the display’s calibration, panel technology, and the software ecosystem supporting it.” Furthermore, a common myth is that any stylus will perform well on a high-res matte screen. In reality, incompatible nibs, poor tilt recognition, and latency issues can sabotage your precision, especially when working on detailed illustrations or vector art. One trapping pitfall I encountered was investing in an expensive display without considering the stylus’s calibration capabilities, leading to frustrating ghosting and jitter during long sessions. To avoid such issues, it’s crucial to explore advanced calibration techniques and compatibility guides, as detailed in the ultimate [guide to pen input performance](https://designers.studiolaptopdeals.com/the-ultimate-guide-to-pen-input-performance-on-creative-laptops). Advanced users should also tweak software settings—like pressure sensitivity curves in Adobe Illustrator—to match their stylus hardware, avoiding the curse of inconsistent stroke rendering. How do you ensure your hardware and software sync seamlessly for maximum accuracy? Have you ever fallen into this trap of focusing on specs instead of compatibility? Let me know in the comments.
Keep Your Equipment Running Smoothly
Maintaining your creative setup isn’t just about cleaning; it involves proactive measures to ensure longevity and optimal performance. One effective approach I’ve adopted is routine calibration of my stylus and screen, which I perform using software tools like the ones outlined in this comprehensive guide. Regular calibration prevents jitter, ghosting, and pressure lag, especially critical when working with high-res displays that amplify small inconsistencies.
I’ve also invested in quality protective accessories, such as matte screen films designed specifically for stylus use, like those discussed in this review. These films not only shield against scratches but also improve glide smoothness, reducing stylus wear and screen abrasions over time.
Equip Yourself with the Right Tools
Choosing the right stylus nibs and supporting hardware makes all the difference. I personally prefer ceramic-nib styluses for matte screens; their durability and glide properties make them ideal for prolonged sessions. According to industry expert Lisa Pohl, selecting compatible nibs that match your display’s surface finish prolongs their lifespan and minimizes damage. For detailed compatibility insights, I recommend checking this resource.
Pairing your hardware with editor-specific settings, like tweaking pressure curves in Adobe Illustrator via this article, can significantly reduce stylus stress and improve line quality. Moreover, keeping your device’s firmware and software updated ensures the latest improvements in pen input responsiveness and stability—don’t overlook these routine checks.
Predicting Future Trends
Looking ahead, I believe we’ll see more intelligent calibration systems integrated into professional laptops, leveraging AI to adapt dynamically to user behavior. This evolution promises to make long-term maintenance even more user-friendly. As technology advances, mastering these tools and techniques will be crucial for staying ahead in the demanding world of digital art.
Questions to Ask Yourself
How do I maintain my stylus and display for sustained high performance? Regular calibration, protective accessories, and software tweaks are essential. To take your setup further, try implementing advanced calibration techniques like those detailed in this guide for reducing ghosting and jitter. Small investments in these areas can yield significant long-term benefits, preserving the clarity and responsiveness of your digital workspace. Need personalized advice? Reach out via this contact page and let’s discuss the best solutions tailored for your setup.
Lessons That Changed My Approach to Matte Screen Magic
One of the biggest surprises I uncovered was how critical proper calibration is for protecting matte screens from unwanted scratches caused by stylus nibs. I used to believe that simply switching to softer nibs was enough, but I realized that without consistent calibration, even the best nibs can cause damage over time. This lesson taught me that proactive maintenance and understanding your hardware’s quirks are essential for preserving your screen’s pristine surface.
Another insight was recognizing the often-overlooked power of screen protectors. Applying a high-quality matte film transformed my drawing experience, providing a layer of insulation against nib wear and reducing friction that can lead to surface abrasions. It became clear that investing in tailored accessories isn’t just about comfort—it’s about long-term device health and artistry.
Lastly, I learned that software settings—like pressure sensitivity curves and tilt recognition—are as vital as hardware choices. Tweaking these parameters can significantly minimize stylus pressure, which in turn minimizes the risk of scratches and extends the lifespan of both nibs and screens. This holistic approach—combining hardware, calibration, and software—has been a game-changer in my creative workflow.
My Go-To Resources for Elevating Your Digital Art Setup
For honing my skills and understanding the nuances of stylus support on high-resolution displays, I rely on trusted sources like this comprehensive guide. It offers practical tips tailored specifically for creative professionals navigating the complexities of modern tech. Additionally, I turn to industry podcasts such as “The Creative Tech Show,” which often feature experts discussing emerging trends in pen input accuracy and device calibration techniques.
Books like “The Art of Screen Calibration” have deepened my understanding of color fidelity and display adjustments, ensuring my artwork looks as intended across devices. When seeking community wisdom and firsthand experiences, online forums dedicated to digital artists provide invaluable insights and troubleshooting hacks shared by peers facing similar challenges. These resources collectively help me refine my setup continually and push my artistic boundaries.
Harness Your Passion: Elevate Your Digital Art Journey
Embrace the journey of mastering your stylus and high-res display. Every adjustment, every calibration, and every accessory choice brings you closer to a seamless creative flow that not only produces better art but also safeguards your investment. Remember, the most profound improvements often come from small but intentional tweaks. So, stay curious, keep experimenting, and let your passion for digital artistry inspire you to create craft and innovate with confidence.
What strategies have you found most effective for maintaining your matte screens and stylus setup? Share your tips below—I’d love to hear your experiences and ideas!