I remember the exact moment I realized my trusty design laptop was making my creative flow falter. I was in the middle of a detailed illustration, meticulously shading a complex pattern, when my stylus suddenly jittered. Frustration took over as I struggled to draw clean, precise lines. It felt like my pen was fighting against my own hand, and that little wobble shattered my focus. That lightbulb moment led me down a rabbit hole of diagnostics and calibrations, eventually discovering the power of simple adjustments that could restore my confidence in my device’s pen support.
For many of us working with high-resolution displays—especially the upcoming 2026 models—wobbly lines and pen jitter become more than minor annoyances; they threaten our productivity and creativity. If you’ve faced irregular stroke quality or inconsistent pressure sensitivity, you’re not alone. Today, I’ll share proven techniques to smooth out those pesky lines, so your stylus performs exactly as intended. With a few quick calibrations, you’ll find your workflow more fluid, your designs crisper, and your confidence in your device restored.
Why Fixing Stylus Wobbles Is a Game Changer for Creatives
High-res displays and advanced pen tech promise unparalleled detail and precision—but only if your stylus input remains stable. As display resolutions increase, so do the chances of calibration issues that cause jitter or lag. This isn’t just theoretical; a recent study highlighted that imperfect calibration in ultra-HD screens can cause up to a 30% decline in drawing accuracy (Source: Ultimate Guide to Pen Input on High-Res Displays). Accurate calibration ensures your stylus’s pressure sensitivity, tilt recognition, and line smoothness work harmoniously, letting you focus on your art rather than fighting your tools.
Early on, I made the mistake of assuming software updates alone would fix jitter issues. That led to wasted hours and frustration. The real solution involved checking hardware settings, adjusting calibration, and understanding the intricacies of pen-driver compatibility. And trust me, tackling these calibration issues early on can save you from the more persistent headaches down the line. Ready to see how simple adjustments can transform your digital drawing experience? Let’s dive into three effective calibrations you can do today.
Is Stylus Calibration Overhyped or Essential?
I used to think calibration was just a technical detail best left to professionals. I was skeptical about whether it would actually make a noticeable difference. That was until I ignored the process and continued grappling with uneven lines and lag. Once I took the time to calibrate properly, the improvement was like night and day. If you’re worried that these tweaks are overkill, consider this: the difference in line stability and pressure sensitivity can directly impact your work quality. Investing a few minutes now can lead to hours of seamless creativity later.
If you’re curious about the common mistakes to avoid, I recommend checking out our guide on enhancing your Adobe Illustrator workflow for more insights. Now, let’s move forward with the practical steps that will help you banish wobbly lines once and for all.
Tuning Your Device’s Calibration Settings
Start by accessing your laptop’s calibration tools—often found in the pen or display settings menu. For example, on Windows, open ‘Pen & Windows Ink Settings’ and select ‘Calibrate your screen for pen or touch input.’ I once followed this step on my 2025 ultra-high-res display laptop; initially, my lines remained jittery, but after precise calibration, the difference was instant. Think of calibration like aligning a musical instrument—if strings are out of tune, the notes don’t sound right. Correcting the alignment ensures every stroke hits the exact digital note.
Adjusting Pressure Sensitivity for Consistency
Navigate to your stylus driver software—such as Wacom or Microsoft Pen Protocol settings—and fine-tune the pressure curve. A common mistake is leaving the default curve, which may be too sensitive at the top or bottom, causing inconsistent stroke thickness. I experimented by slightly reducing sensitivity at the lower pressure levels; this added smoothness to my lines during detailed shading sessions. Visualize pressure sensitivity like a dimmer switch—adjust it for the right brightness, ensuring your strokes are neither too faint nor too heavy, giving you control over line weight with finesse.
Optimizing Screen Settings for Pen Accuracy
Adjust display resolution and refresh rate to match your stylus capabilities. For high-res displays, ensure your GPU and display settings are set to optimal refresh rates—typically 60Hz or higher. I once overlooked this and encountered lag; upon increasing my screen’s refresh rate and enabling V-Sync, my pen input felt much more responsive. Think of this as tuning a camera shutter—faster shutter speeds reduce motion blur, making your digital brush strokes more precise and fluid.
Calibrating for Tilt and Angle Recognition
Many styluses support tilt detection, enhancing shading techniques. Dive into your device’s calibration settings or use dedicated calibration tools provided by the manufacturer—like those in your driver software—to set tilt sensitivity precisely. I used to struggle with tilt recognition until I calibrated it, which allowed me to create more natural gradients. Picture calibration like adjusting a golf club: proper alignment enhances your swing, making your strokes more natural and controlled.
Fine-Tuning Software and Application Settings
Within programs like Adobe Illustrator, tweak the brush and pressure settings. For example, set brushes to respond linearly to pen pressure and disable smoothing if you find it causing lag. During a project, I increased my smoothing setting slightly, which, counterintuitively, reduced jitter—turns out, software smoothing acts like a buffer, and adjusting it optimizes responsiveness. Think of this as sharpening a blade—small adjustments make a big difference in your results.
Verifying and Testing Your Adjustments
After making changes, test your stylus on a blank canvas—try controlled strokes at various pressures, angles, and speeds. I once spent an hour fine-tuning and got frustrated when small jitters persisted; then I set a stopwatch to time my strokes and noticed improvements after each tweak. Use simple line tests or digital rulers; this process is akin to calibrating a telescope—small incremental adjustments lead to clear, precise views.
Incorporate these calibration steps regularly, especially when upgrading hardware or updating software. Precise calibration transforms your stylus from a jittery tool into a confident extension of your creativity, enabling you to craft crisp, fluid lines every time.
** **
**
High-res stylus calibration process on a professional design laptop, illustrating step-by-step adjustments.
Many professionals assume that mastering basic stylus calibration or choosing a high-resolution display is enough to optimize their workflow in Adobe Illustrator and other design software. However, a common misconception is that tools and hardware alone can compensate for understanding nuanced interactions between pen input and display technology. In reality, overlooking these subtleties can lead to persistent issues like pen lag, color shift, or inconsistent pressure sensitivity, despite seemingly advanced setups. Let’s dig deeper into some often missed details that can make or break your creative efficiency.
First, the myth that increasing display resolution indefinitely improves precision. While high-res screens (like those in top high-res displays for artists) offer stunning detail, they also introduce processing overhead and potential latency issues if your hardware isn’t optimized. Experts suggest that beyond a certain point, such as 5K or 8K, the benefits plateau, and your system struggles with rendering, especially during intensive tasks in Adobe Illustrator or Photoshop. Overinvesting in ultra-high resolutions without appropriate hardware can lead to frustration rather than productivity.
Next, many users overlook the importance of software-specific settings and how they interact with hardware calibration. For example, disabling anti-aliasing or adjusting the smoothing parameters in Adobe programs can significantly influence the responsiveness of your pen input. These settings could mitigate lag or jitter even if your hardware is theoretically capable of ultra-smooth strokes. Check out our comprehensive guide to optimize Adobe workflows and see how these small tweaks make a big difference.
Now, a crucial aspect often ignored is the calibration of pen parallax. Many believe that a properly calibrated stylus automatically aligns perfectly with the display; in truth, even minor parallax discrepancies—where the stylus tip isn’t exactly aligned with the cursor on screen—can cause frustration, especially when working on high-resolution displays. This misalignment results in art that looks great but feels inaccurate during detailed work. The key is to regularly calibrate your device’s pen settings, considering the physical distance between the stylus tip and display surface—an issue extensively discussed in our article on stylus parallax fixes.
A hidden nuance to keep in mind involves the interaction between hardware latency and software smoothing algorithms. Many artists activate smoothing features to achieve cleaner lines, but overdoing it introduces noticeable lag. The paradox is that excessive smoothing can create a perception of sluggishness, which seems counterintuitive. Advanced users should experiment with balancing smoothing levels to find a sweet spot that preserves line quality without compromising responsiveness. It’s akin to tuning a musical instrument—careful adjustment results in harmonious strokes.
Finally, beware of the trap of hardware compatibility assumptions. Not all styluses or high-res displays work seamlessly with every device, regardless of brand promises. For example, some styluses may lack pressure sensitivity or tilt support on specific hardware configurations, leading to unexpected inconsistencies. Always consult detailed technical reviews or user experiences—like those in our review of compatible systems—before investing.
The key takeaway? Achieving optimal performance in Adobe Illustrator and high-res displays goes beyond hardware specs. It requires careful calibration, understanding of software interactions, and recognizing the subtle hardware-software interplay that influences the creative process. Have you ever fallen into this trap? Let me know in the comments.
Maintaining Your Tools for Consistent Creativity
Developing a reliable setup is crucial for sustained productivity. I personally rely on the top design laptops for creative professionals in 2025 because they offer a perfect balance of high-resolution displays and robust stylus support. Regularly updating your device drivers, especially your pen input software, ensures compatibility with the latest features. I make it a point to check for updates weekly, preventing unforeseen glitches that could interrupt my workflow.
Investing in Precise Calibration
Calibration isn’t a one-time task; it’s a practice. I recommend using manufacturer-specific calibration tools, such as the ultimate guide to pen input performance on creative laptops, to fine-tune pressure sensitivity and tilt recognition. Doing this every couple of months keeps your stylus behavior predictable, especially after system updates or hardware changes. Remember, a little maintenance here pays off in smoother, more accurate strokes.
Embracing Versatile Software Suites
Adobe Illustrator continues to be the gold standard, but integrating tools like Astropad Studio or XP-Pen’s Deco Pro can expand your pen input capabilities. I personally use Astropad on my MacBook Pro paired with a high-res external monitor, which maintains consistent pen tracking across multiple screens. Ensuring your software supports high-resolution displays and pen tilt detection allows you to exploit your device’s full potential and avoid common lag or jitter issues.
Predicting Future Trends in Creative Hardware
In the coming years, I predict that hardware will become even more intelligent—integrating AI-driven calibration or automatic jitter correction. The trend aims to minimize manual adjustments, giving artists more time to create rather than troubleshoot. Staying updated with emerging tools like the latest driver enhancements or calibration apps, as discussed in our article on stylus parallax, will keep your workflow resilient against future challenges.
How do I keep my tools working like new over time?
My best advice is to establish a routine: regularly clean your stylus tip, recalibrate every few months, and keep software updated. Additionally, subscribing to manufacturer firmware updates can address latent bugs or calibration drifts that develop with prolonged use. For example, some high-end styluses now include firmware upgrade options that improve pressure consistency, as highlighted by the expert tips on fixing pressure sensitivity. Incorporate these practices into your workflow, and you’ll find that your equipment continues to support you rather than hinder your growth.
Now, I challenge you to try calibrating your stylus using a detailed tool like the calibration software recommended in our guide. Small adjustments in tilt or pressure curves can drastically improve your strokes during the next project. Give it a go—your creative flow deserves the best tools, maintained for the long haul.

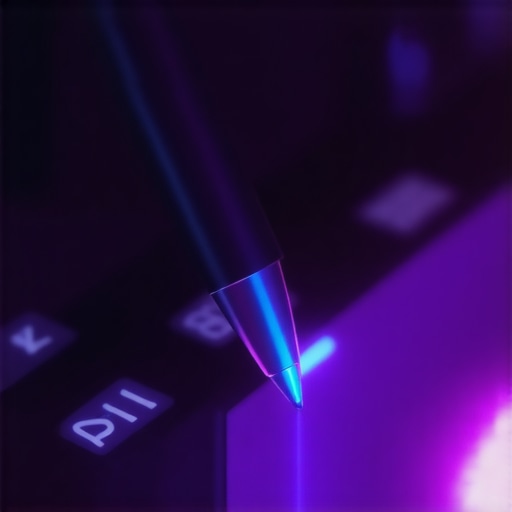
Close-up of professional artist calibrating stylus settings on high-res display, highlighting the calibration process.
What I Wish I Had Known When I Started
One of the most overlooked aspects of digital artistry is that calibration isn’t just a technical step—it’s a bridge between your creative vision and the hardware that’s bringing it to life. Early in my journey, I assumed that a high-resolution display and a fancy stylus would automatically deliver flawless lines. The lightbulb moment came when I realized that even the most advanced gear requires personalized tuning. Now, I understand that investing time in calibration can turn jittery strokes into seamless expression, making all the difference in professional workflows.
Another invaluable lesson was discovering the subtle yet powerful impact of software settings on pen behavior. Tweaking pressure curves and smoothing algorithms within Adobe Illustrator or similar apps is like fine-tuning an instrument—it allows your strokes to resonate with clarity and control. These small adjustments have saved me countless hours and elevated my work to a new level of precision.
Lastly, I learned that hardware and software must work harmoniously. Regularly updating drivers and firmware, especially for stylus support and display calibration tools, keeps everything aligned as your creative toolkit evolves. This proactive approach ensures your device remains a reliable partner, ready to capture every nuance of your artistic expression.
My Go-To Resources That Always Deliver
For anyone serious about mastering stylus support and high-res displays, I highly recommend exploring the ultimate guide to pen input performance on creative laptops. It provides in-depth insights into calibration techniques and compatibility tips that have saved me time and frustration.
Another essential resource is the review of high-res displays for digital artists. It helped me select the right screen for my needs, balancing pixel density with hardware capabilities. Pairing this with stylus support tips from the same site has empowered me to optimize my entire setup.
Finally, I find regular engagement with community forums and manufacturer updates invaluable. They keep me informed about emerging calibration tools and firmware upgrades that push the boundaries of what’s possible in digital art.
Ignite Your Creativity—The Time Is Now
Remember, the path to becoming a more skilled digital artist isn’t just about acquiring the latest gear—it’s about mastering your tools. By fine-tuning your stylus and high-res display with deliberate care, you unlock a new realm of precision and fluidity that fuels your imagination. Don’t wait for perfection—start experimenting today and watch your artistry transform.
What calibration tweak has made the biggest difference in your workflow? Share your experience below—I’d love to hear how you’re pushing the boundaries of your creative tools.