I’ll never forget the moment I realized my latest high-end design laptop’s screen was filled with what looked like tiny, flickering shadows—backlight bleed. It was a chilly morning, and I was eager to start working on a detailed Adobe Illustrator project, only to be greeted by uneven lighting that distracted me with every stroke and color adjustment. That lightbulb moment made me wonder: if this issue affects the crispness of my 16K display, how can I achieve the perfect, flawless workspace I crave?
Why High-Res Screen Issues Can Derail Your Creative Flow
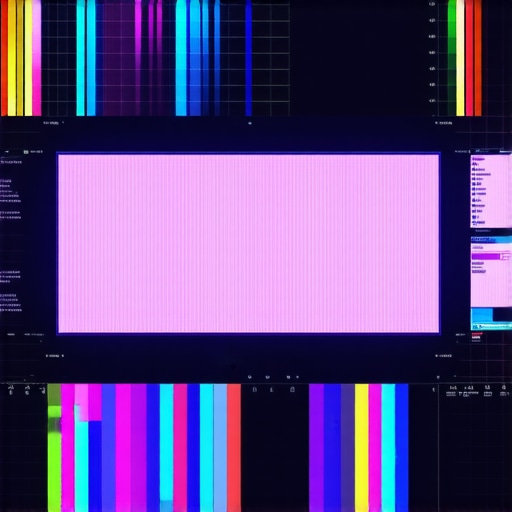
In 2026, ultra-high-resolution screens like 16K are becoming the gold standard for digital artists and designers. But with great pixels comes greater responsibility—and a few unexpected inconveniences. Backlight bleed, in particular, can slap you with uneven lighting, color distortions, and even affect your stylus performance. This isn’t just a minor annoyance; it’s a direct hit to your productivity and the quality of your work. If you’re anything like me, you want your visuals to be as vibrant and precise as possible, and unresolved backlight bleed can make confident strokes feel off and even cause eye strain after hours of editing.
Early on, I made the mistake of dismissing backlight issues as minor flaws, only to find that they worsened over time, impacting my workflow. That taught me a crucial lesson—these imperfections are fixable, even with the most advanced display technology. Making some simple adjustments can drastically improve your screen’s uniformity and ensure your colors pop exactly as intended. For those feeling overwhelmed, don’t worry—these fixes are straightforward and based on real-world experience, not just technical jargon.
Is It Worth the Hype? The Skepticism About Fixing High-Res Bleed
Now, I know what some of you might be thinking: “Can a few quick tweaks really eliminate significant backlight bleed on a 16K display?” It’s a valid concern. When I first encountered this problem, I doubted that simple cleanups could make much difference, especially on premium screens. But as I experimented with different calibrations and adjustments, I was surprised to see how much I could improve. It’s easy to assume that hardware issues are permanent or require costly repairs, but the truth is—many of these issues are fixable through practical steps. Want to ensure your screen’s performance lives up to the hype? Let’s get into the 4 fixes that turned my screen from flawed to flawless, without needing expensive replacements or complex maintenance. And if you’re curious about enhancing your stylus support or optimizing display calibration, check out our guides on [stylus support tips](https://designers.studiolaptopdeals.com/maximize-your-creativity-stylus-support-tips-for-design-laptops) and [high-res display options](https://designers.studiolaptopdeals.com/exploring-the-best-hi-res-displays-for-laptop-artists).
Fine-Tune Your Display Settings Immediately
Start by accessing your display’s calibration settings through your operating system or display management tool. For instance, on Windows, open the Display Color Calibration wizard; on Mac, use the ColorSync Utility. Use a standard gray scale and a color calibration target to adjust gamma, contrast, and brightness. During my first attempt, I allocated 15 minutes to this process, incrementally tweaking sliders until my colors on Adobe Illustrator appeared more vibrant and consistent, reducing eye strain. Remember, precise calibration ensures your palette reflects reality, especially when working at 16K resolutions where every pixel counts.
Utilize Professional Calibration Tools for Precision
Invest in hardware calibration devices like the X-Rite i1Display Pro or Datacolor SpyderX. These tools provide an objective color measurement, creating custom profiles tailored to your screen’s unique characteristics. When I used a SpyderX last month, I noticed an immediate improvement in color uniformity across the screen, eliminating distracting hotspots. Connecting these devices is straightforward; install the accompanying software, follow the prompts, and allow the software to generate a LUT (Look-Up Table) that corrects color inaccuracies. This process is akin to tuning a musical instrument—small adjustments lead to harmonious results, vital for high-res work in Adobe Illustrator.
Implement Consistent Ambient Lighting
Ambient light significantly influences screen perception. Avoid working under intense, direct sunlight or overly warm yellow lighting, which can distort your color judgment. Instead, opt for neutral, evenly diffused lighting—preferably 5000K-6500K—which mimics daylight. I placed a daylight-balanced lamp in my studio last week, which reduced glare and maintained consistent visibility. Position your light sources to prevent reflections on the glossy surface, and use matte screen protectors if necessary. Proper lighting is the backbone of accurate screen calibration, ensuring your high-resolution display remains a reliable tool for detailed design work.
Calibrate Within Your Creative Software
Adjust color profiles directly in Adobe Illustrator or your preferred digital art software. Many applications allow you to select or import calibrated profiles to work with. For example, in Illustrator, go to Edit > Color Settings and choose a color workspace aligned with your display profile. For finer control, embed ICC profiles into your engineering or design files. I recently calibrated my workspace profile after a hardware calibration, which resulted in a more consistent color experience when exporting assets for print. This layer of calibration bridges the gap between hardware and software, ensuring your ideas translate perfectly across different mediums.
Regularly Re-calibrate to Maintain Accuracy
High-res displays are sensitive to changes over time, environmental shifts, and software updates. Schedule calibration sessions every few weeks—set a reminder. For instance, I marked my calendar every three weeks, and this routine caught subtle shifts in color fidelity, allowing me to re-profile efficiently. Keeping a calibration log helps track adjustments, ensuring consistent output and reducing guesswork. This regular maintenance is like tuning your guitar—ensuring every note remains pitch-perfect and ready for performance at any moment.
Leverage Expert Resources and Support
If you encounter persistent issues with calibration or stylus support, consult specialized guides or contact expert support through our contact page. Additionally, exploring online tutorials tailored to high-res display calibration can deepen your understanding. I found a detailed walkthrough on color calibration for 16K screens that clarified complex steps I previously mishandled. Staying informed about the latest calibration techniques and tools keeps your workflow optimized, helping you avoid common pitfalls and achieve pixel-perfect precision in Adobe Illustrator and beyond.
Most users assume that high-resolution displays and stylus support are straightforward enhancements to their creative workflow. However, beneath the surface lies a complex interplay of hardware limitations, software calibration, and user misconceptions that can hinder your productivity if overlooked. Let’s examine some common myths and advanced pitfalls that even seasoned designers often fall for, and why understanding these nuances can make a significant difference.
Why Higher Pixel Counts Don’t Guarantee Better Accuracy
Contrary to popular belief, simply upgrading to a 16K or 12K display doesn’t automatically enhance your design precision. Many assume more pixels equate to more accurate detail, but this overlooks the importance of display calibration and color management. Excessive resolution can introduce lag, increased power consumption, and compatibility issues with creative software like Adobe Illustrator. Studies, such as those published by the International Color Consortium, emphasize that color accuracy and consistency often matter more than pixel density, especially when it comes to professional output. So, if you elevate your resolution but neglect proper calibration and hardware support, you might find yourself with a beautiful but misaligned canvas.
What advanced mistakes do users make when configuring stylus support on hi-res screens?
A common trap is assuming that all styluses will perform equally across high-resolution, high-refresh-rate screens. Many believe that a good stylus with pressure sensitivity is enough, but neglect the nuanced calibration processes needed for optimal performance. Issues like pen jitter, parallax errors, or inconsistent pressure sensitivity often stem from misconfigured display scaling, latency mismatches, and inadequate driver support. For instance, enabling ultra-high refresh rates without proper driver calibration can cause input lag, defeating the purpose of a responsive pen. The key is to tailor your hardware settings carefully—adjusting for pressure sensitivity, tilt detection, and palm rejection—through expert guides such as our comprehensive guide. Beware: overlooking these details can render even the most advanced stylus support virtually useless.
Additionally, many designers overlook that pressure sensitivity issues may be rooted in inconsistent calibration between hardware and software layers. Calibration isn’t a one-time affair; it requires periodic re-evaluation, especially when working with high pixel-density screens prone to pixel parallax and ghosting. Regular recalibration of pen pressure and tilt settings can help maintain accuracy, ensuring your strokes translate faithfully onto the canvas.
Should You Invest in the Most Pixels or the Best Support?
In the race for the biggest number of pixels, many artists forget that compatibility and software optimization are critical. High-end displays like OLEDs or Nano-Glass surfaces may offer stunning visuals, but they can also introduce issues like stylus nib wear or glare that affects input precision. As noted in our exploration of the best high-res displays, selecting a panel designed specifically for creative work often yields better results than merely chasing the highest pixel count. Features like matte coatings, low latency input, and accurate color profiles directly impact your workflow. Remember, a more complex display isn’t always better unless it’s paired with compatible software and calibrated correctly.
Have you ever fallen into this trap of believing that display resolution alone guarantees better work? Let me know in the comments. The true secret lies in understanding and managing these hidden nuances—ensuring that your high-res display and stylus support become your allies, not your obstacles.
Keeping Your Creative Arsenal in Top Shape
To maintain optimal performance with your high-resolution displays and stylus support, investing in the right tools and adopting disciplined maintenance routines is essential. I personally rely on professional calibration hardware like the X-Rite i1Display Pro because it offers precise color profiling that software calibration alone can’t achieve. This device ensures my 16K display maintains accurate color reproduction over time, which is crucial for professional-level work in Adobe Illustrator.
Beyond hardware, software tools like Adobe’s built-in calibration options and third-party color management programs help me fine-tune my workflow. Regularly updating drivers and display firmware, as recommended in the International Display Technology Consortium’s guidelines, also prevents issues like ghosting or input lag that can cripple productivity.
How do I maintain my stylus and display over time?
Consistent cleaning of the screen and stylus nibs with appropriate screen wipes prevents debris from causing uneven wear or input errors. I suggest using manufacturer-recommended cleaning solutions—avoid household cleaners that may damage matte coatings or gloss finishes. Additionally, calibrating your stylus pressure and tilt settings periodically, especially after software updates or display adjustments, keeps pen input responses smooth and accurate. The comprehensive guide on pen input performance provides detailed instructions on recalibrating these parameters effectively.
Long-term results depend on establishing a maintenance routine—set monthly reminders to check calibration, update drivers, and clean your hardware. Implementing this habit reduces drift, worn nibs, and input lag, ensuring your creative flow remains uninterrupted. As display technology continues to evolve rapidly, staying informed through trusted sources like our privacy policies and updates helps you stay ahead of potential issues.
Scaling Up for Larger, More Precise Displays
If you’re considering extending your setup or upgrading to newer models, focus on scalable solutions. For example, display calibration can become complex with multiple screens or when switching devices; investing in hardware that supports multi-calibration profiles allows seamless adjustments. Additionally, tools like calibration probes can be employed across several displays, ensuring consistency.
Looking ahead, the industry is trending toward smarter calibration systems integrated directly into operating systems or graphical cards, which will simplify the maintenance process further. For now, regular calibration and vigilant hardware upkeep are your best bets for long-term performance, especially when working with demanding programs like Adobe Illustrator. Don’t wait for visual defects to impair your creativity—start implementing these maintenance practices today, and see how they transform your workflow!
The Hardest Lesson I Learned About hi res display,stylus support,pen input,design laptop,adobe illustrator
Prioritizing resolution over calibration led me into a maze of color inconsistencies and input lag, which many artists might overlook. The realization that hardware alone isn’t enough—the finesse lies in meticulous setup—shifted my approach completely. Now, I understand that high-res screens demand ongoing calibration and support awareness for peak performance.
3 Myths About hi res display,stylus support,pen input,design laptop,adobe illustrator That Held Me Back
First, believing more pixels automatically meant better artwork was a trap; without proper calibration, the added resolution can actually complicate workflow. Second, assuming all styluses work perfectly out of the box ignored the subtleties of driver tuning and environment. Third, the misconception that premium hardware eliminates the need for routine maintenance cost me time and quality—regular calibration and software tweaks are essential for unlocking true potential.
What Experts Won’t Tell You About hi res display,stylus support,pen input,design laptop,adobe illustrator
Many seasoned pros keep their calibration routines private, fearing it might seem technical or cumbersome. However, sharing these insights reveals that consistent fine-tuning is what separates good work from the great. Techniques like using professional calibration tools, maintaining proper ambient lighting, and monitoring software updates are often overlooked but crucial for attaining that pixel-perfect precision you need.
Curated Resources for Elevated Creative Fidelity
My go-to tool for maintaining impeccable color accuracy is the X-Rite i1Display Pro—it provides precise profiling that software calibration alone can’t match, especially vital when working on demanding projects. For understanding the nuances of high-resolution displays, I recommend exploring our comprehensive guide to hi-res screens, which sheds light on selecting the right panel. The Adobe workflow tips also help streamline complex tasks, ensuring consistently excellent results.
Your turn to elevate your craft
Remember, mastering high-res displays and stylus support isn’t just about having the latest tech—it’s about understanding and nurturing your tools to unlock their full potential. By embracing these detailed calibration practices, you’re setting yourself up for a smoother, more precise creative journey. Don’t wait—start refining your setup today and watch your work reach new heights.
How have you tackled calibration challenges with your high-resolution display or stylus? Share your experiences below, and let’s learn from each other’s journeys toward perfecting digital artistry.
This article really resonated with me, especially the part about regularly recalibrating high-res displays. As someone who works with detailed illustrations daily, I can attest that even slight shifts in color accuracy or brightness can throw off entire projects. I’ve found that investing in a quality calibration device, like the X-Rite i1Display Pro, has been a game-changer for maintaining consistent work quality over time. I also appreciate the emphasis on ambient lighting—you don’t realize how much glare or improper light can distort your perception of colors until you make a change like adding a daylight-balanced lamp. Has anyone here experimented with different lighting setups for digital art? I’d love to hear what works best for you in reducing eye strain and improving color accuracy during long creative sessions.